
How to make a booklet from a PDF
User guide contents ↓The Book & Catalog Imposition workspace turns a PDF (or a set of images) into a print-ready booklet in two steps: page arrangement, then imposition onto the press sheet. This guide covers uploading, page order, book size and the binding; covers, page numbers and double-sided printing are in How to add a cover, page numbers and print a book.
Overview and the ready-to-use workspace: booklet and catalog imposition online.
Upload files
In the top bar choose Tools → Book imposition (or open booklet imposition directly), then drag your files into the upload box. It accepts multi-page PDFs as well as JPG and PNG images; uploading multiple files at once is supported.
- Files are sorted naturally by filename:
1.pdf, 2.pdf, 10.pdf(not 1, 10, 2). - Files with the word cover in their name (the Vietnamese
biaalso works) are put on the cover and exported as a separate cover file.
Arrange
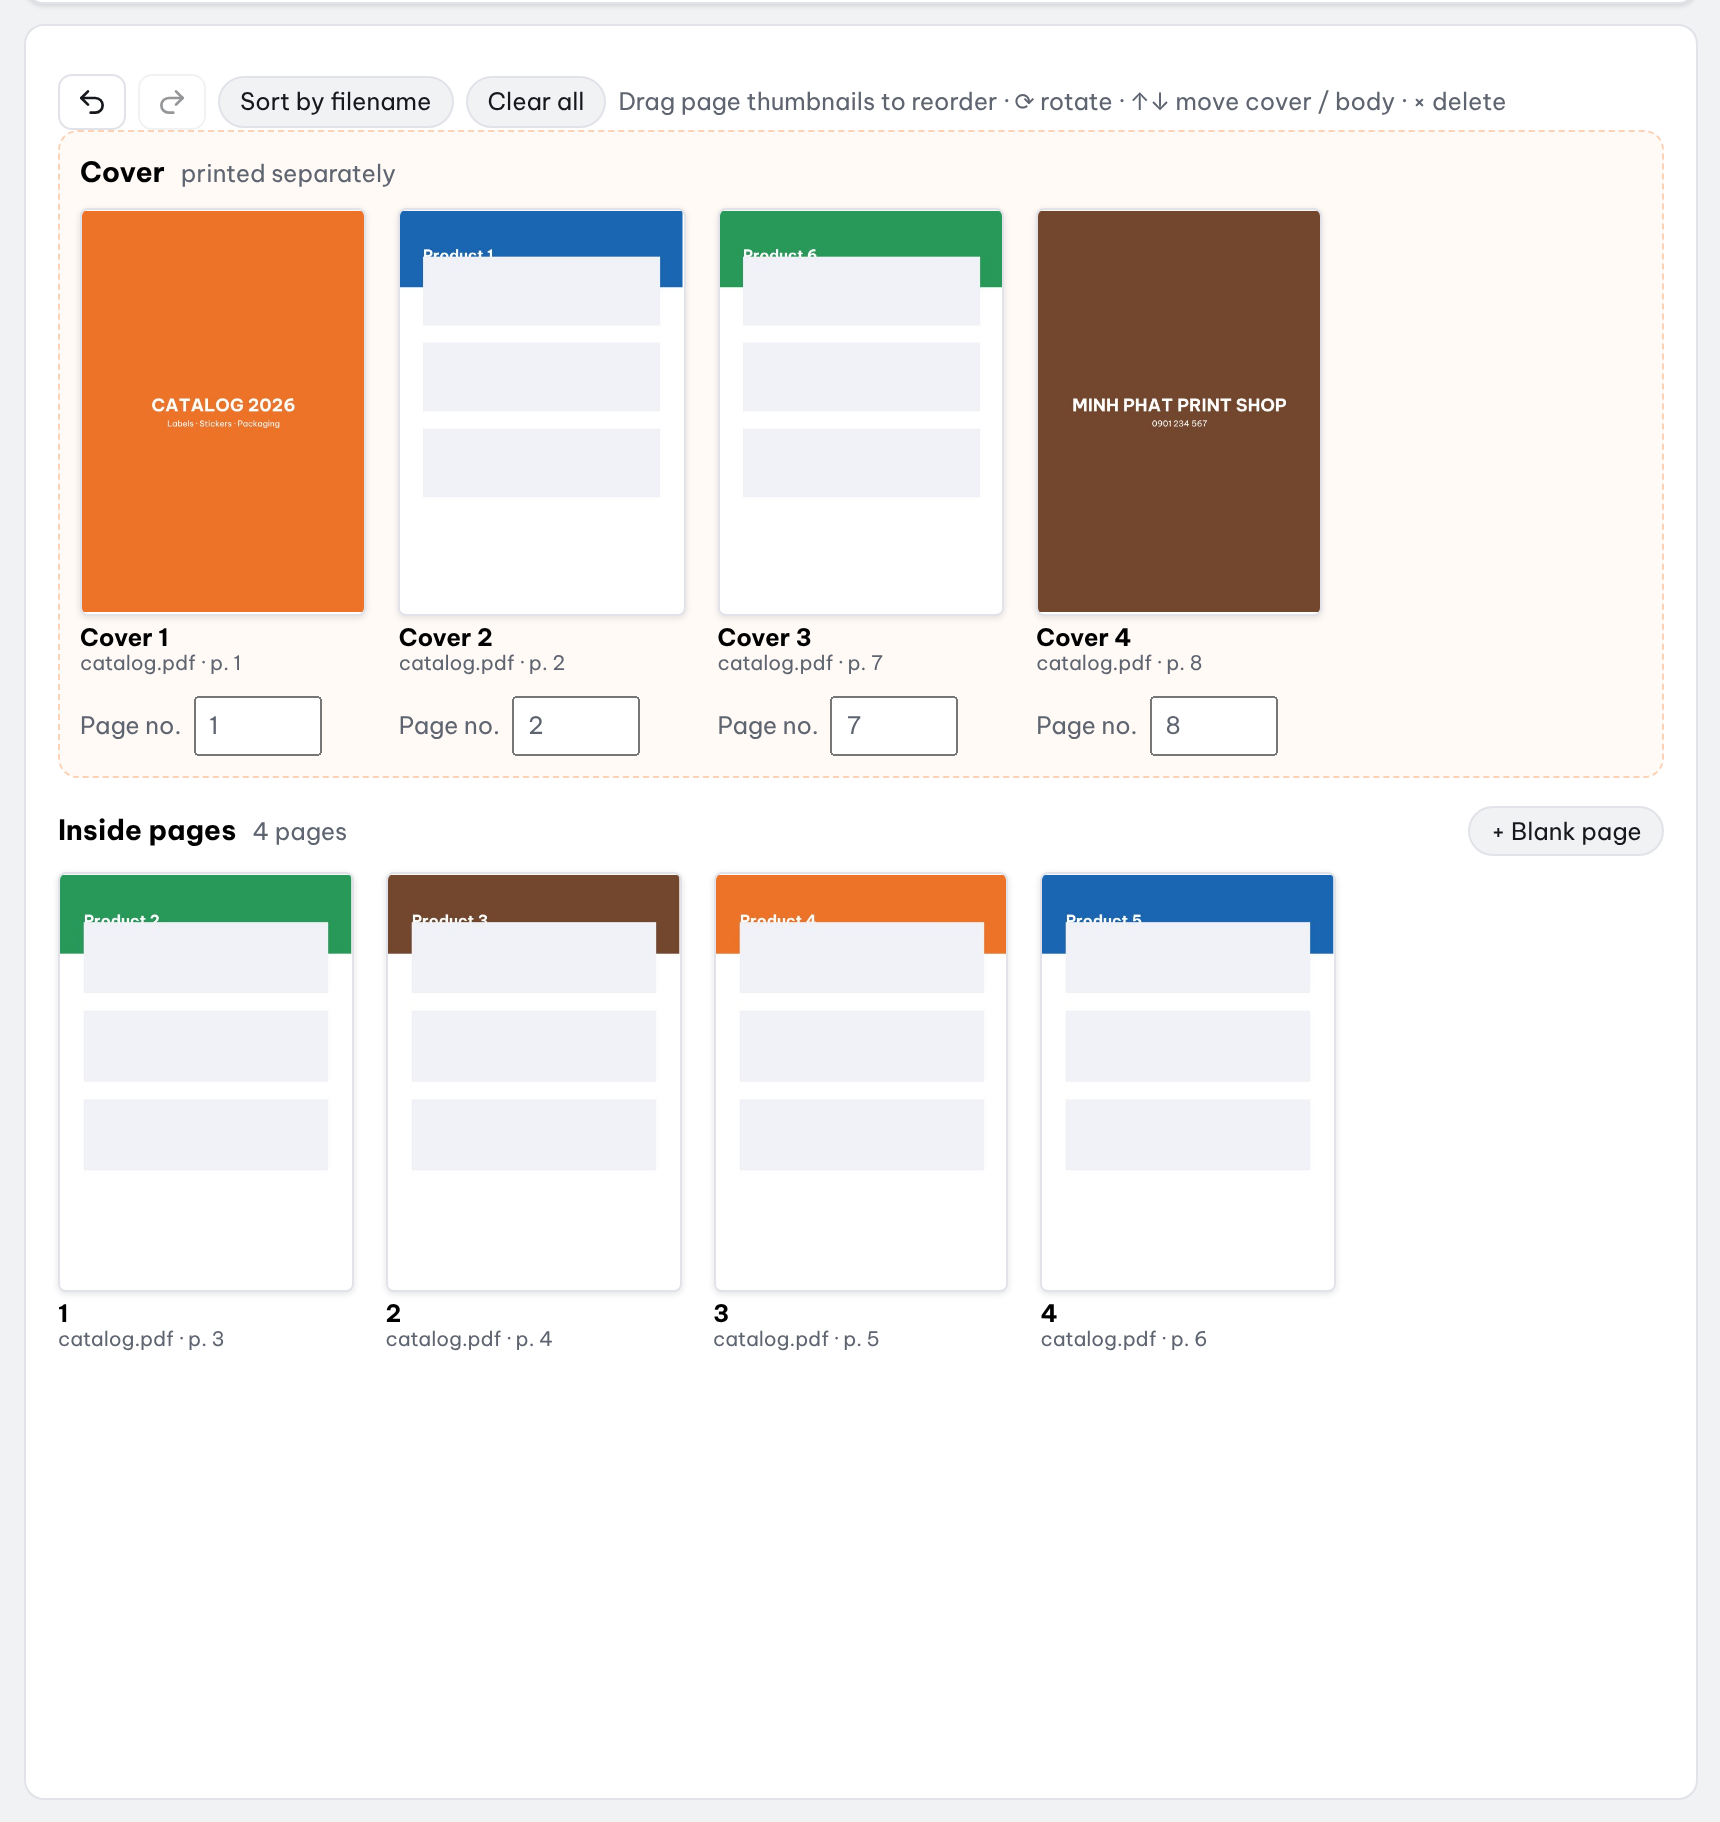
- File list: click ↑ ↓ to reorder files, or ✕ to remove an entire file.
- Page thumbnails: drag and drop to rearrange. Each page has buttons to rotate 90°, toggle cover/body, and delete. Cover slots have no delete button: to drop a cover page, move it back to the inside pages and delete it there.
- Sort by filename: re-sort all body pages by filename and page number. Clear all removes every uploaded page so you can start over (it cannot be undone).
The body page count appears at the top of the middle pane. Saddle stitch requires body pages in multiples of 4; if pages are missing, Trimto automatically adds blank pages at the end.
Tip: click Book preview to flip through each page of the finished piece, including the cover, before moving on to the next step.
Book size
The Book size section at the top of the right column defaults to Original size (the size of the first page). To print a smaller or larger book than the file, pick a preset (A6, A5, B5, A4, Half Letter, 6 × 9 in, Letter) or edit Width and Height: the selector switches to Custom and every page scales to match, with a line showing the scale compared with the original. The chain button between the fields locks the aspect ratio (on by default), so changing one side updates the other. The ⇄ button swaps portrait and landscape. For pages with a different ratio, choose Fit to size or Keep size, center.
Prepare files before uploading
How well the book comes out depends heavily on the input file. Before uploading:
- One page size throughout: mixing A4 and A5 pages skews the book or forces scaling. Split mismatched pages into their own file or re-export them at one size.
- Single pages, not spreads: pages should be one by one in reading order. A file exported as spreads (two pages side by side on one PDF page) needs to be re-exported as single pages.
- Separate cover if it uses different paper: put
coverin the file name so Trimto puts it in the cover section. - Name files in order:
01.pdf, 02.pdf…is easy to read, even though Trimto already sorts names the way people read them.
What page order decides
In a saddle-stitched book, sheets nest inside each other, so page 1 and the last page share a sheet and page 2 sits on the back with the second-to-last page. Adding or removing one page in the middle changes the whole imposition. You do not calculate this yourself: just make sure the page order in the list matches the finished book and Trimto lays it onto sheets.
Choose a binding
Select your option under Binding type at the top of the left column. Trimto imposes book blocks and covers according to your selection.
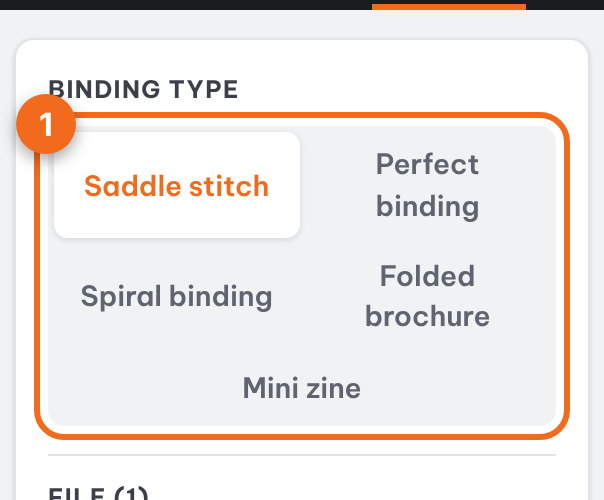
| Type | Best for | Book block imposition |
|---|---|---|
| Saddle stitch | Catalogs, thin magazines, booklets, menus | Folded sheets nested together, interior page count must be a multiple of 4 |
| Perfect binding | Books, thick catalogs | Cut single sheets stacked, wraparound cover with spine |
| Spiral (wire-o) binding | Notebooks, documents, calendars | Loose sheets, separate front and back covers |
Choosing a binding by page count
| Interior pages | Suggestion | Why |
|---|---|---|
| Up to about 48–64 pages | Saddle stitch | Cheap, folds flat, stays open; beyond this the inner sheets push out too far |
| Over 64 pages | Perfect binding | A real spine for the title, solid in the hand |
| Notebooks, calendars, documents that must lie flat | Spiral (wire-o) | Folds back 360°, pages are easy to add or remove |
These numbers are rules of thumb: the thicker the paper, the sooner saddle stitch gives out. Under 8 pages you usually want a folded leaflet rather than a bound book; see Brochure imposition.
Page count and blank pages
Trimto imposes to the multiple each binding needs and adds blank pages at the end of the book block when it falls short:
- Saddle stitch: a multiple of 4 (each folded sheet carries 4 pages). A 30-page interior becomes 32, with 2 blanks added.
- Perfect binding, spiral: a multiple of 2 (each sheet has 2 sides).
If a blank page has to sit in a specific place (a notes page at the back, say), put it in your source file instead of letting Trimto add it.
Saddle stitch: creep compensation
When folded sheets are nested inside each other, each inner sheet has to wrap around the ones outside it, so its pages stick out a little further at the fore-edge. After trimming, the inner pages lose more of their outside margin. This is called creep. In the imposition step, enter Creep compensation - paper thickness (mm/sheet), the thickness of one sheet (150 gsm coated paper ≈ 0.13 mm). The outermost sheet stays where it is, the next sheet's content moves 0.13 mm toward the spine, the next 0.26 mm, and so on. For thin booklets, leave it at 0. More background: What is creep in booklet printing.
Perfect binding: spine and cover
- Enter Body paper thickness (mm/sheet): Trimto calculates the spine width from it and the interior page count.
- Click Download cover template with spine (PDF) to send the exact dimensions to your cover designer.
- Spine margin - shift content away from spine: the binder mills the spine edge and glues it, which hides about 3–5 mm of each page. Enter that amount so text is not swallowed by the spine; leave 0 if your file already has a wide inside margin or you turned on Inside page margins in step 1.
Working out spine width (perfect binding)
Spine width is the number of interior sheets times the thickness of one sheet: spine = ⌈pages ÷ 2⌉ × paper thickness. Example: a 120-page interior on 0.1 mm paper is 60 sheets × 0.1 = 6 mm. Enter the thickness of the paper your printer will actually use; ask them if you are unsure, because two 80 gsm stocks can differ a lot (bulky uncoated versus smooth coated). The spine then drives the cover template: back cover, spine and front cover laid flat, see Covers.
Spiral (wire-o) binding
Choose Binding edge: Left edge (notebooks, documents) or Top edge (calendars). Set Punch margin - shift content away from binding edge to about 8–10 mm, the strip the wire-o holes take, unless your file already leaves that much room.
After uploading
- Check the body page count at the top of the center frame against your source file.
- Drag misplaced pages into position; rotate pages that came in sideways.
- Add a blank page where you need space for notes, or so a chapter starts on a right-hand (odd) page. It is added at the end of the body; drag it to where it belongs.
- Check the binding you picked (see Choose a binding above), then click Book preview for a last check.
| Problem | Fix |
|---|---|
| Files in the wrong order | Use ↑ ↓ in the file list or Sort by filename |
| One page is sideways | Use the 90° rotate button on that page |
| Cover page sits among the body pages | Use the cover / body switch on the page |
| Want to start over | Clear all, then upload new files |
After printing
The Post-print steps section (left column, imposition step) lists the finishing order for the binding you picked: cut, fold, nest or stack, then bind.
Common mistakes
- Saddle stitch on a book that is too thick: inner sheets stick out after trimming and the fore-edge looks ragged. Enter creep compensation or switch to perfect binding.
- Creep entered in the wrong unit: enter the thickness of one sheet (0.13 mm), not the whole book.
- Wrong paper thickness for perfect binding: the spine comes out too wide or too narrow and the spine text drifts after binding.
- No margin for the binding: perfect binding eats 3–5 mm and spiral punching 8–10 mm; content hugging the inner edge gets lost or punched through.
- Page count not a multiple: Trimto pads with blank pages at the end; check the page board before exporting.
FAQ
How many pages can saddle stitch handle? It depends on paper thickness and the stitcher, but roughly 48–64 pages on 100–150 gsm interior paper. Ask your printer to be sure.
Do I need creep compensation on a thin booklet? Under about 16 pages the shift is a few tenths of a millimetre, so leave it at 0.
If I change binding halfway, do I lose my page arrangement? No. Page order is kept; only how the interior and cover are imposed changes.
Further reading
- Wikipedia, Imposition: why page order on the sheet differs from reading order.
- Trimto tools: Booklet page order calculator.
- Wikipedia, Bookbinding and Saddle stitch.
- Trimto Learn: Saddle stitch vs perfect binding vs spiral binding and What is creep in booklet printing.