
CutContour generator for print and cut
CutContour is the spot color name that RIP software and print-and-cut machines (Roland, Mimaki, Summa, Graphtec and others) read as the line to cut. On Trimto you drop in your sticker or label artwork, the cut line is traced around the outline of each shape, and it is exported as a CutContour spot color on the print page or as a separate cut page. Free, and your files never leave your computer.
Open the cut line tool →Free · runs in browser · files never leave your device
Features
- Auto-traces the outer outline of each shape and keeps inner holes
- Exports a CutContour spot color on the print page (spot name can be changed) or a separate K100 0.2 mm cut page
- Cut line offset in mm to cut inside or outside the outline
- Nests many shapes on one sheet, each with its own cut line
- Accepts PDF, SVG, PNG and JPG; transparent and white backgrounds both work
- No software to install and no watermark; runs in your browser
How it works
- Drop your artwork (PDF, SVG, PNG or JPG) into the workspace.
- Choose "Die cutting"; for white-background images turn on "Remove white background around label".
- Set the sheet size, spacing between shapes and the cut offset, and preview the cut line on the sheet.
- Export the PDF: the CutContour line sits on the print page or on the last page, ready for your machine software.
What is CutContour and why do print-and-cut machines need it?
A print-and-cut machine prints and then cuts around each sticker. To know which line to cut, its software looks for a spot color with a fixed name, most often CutContour (some machines use other names such as ThruCut; Trimto lets you rename it). A line with that name is not printed with ink; it only tells the machine where to cut.
If your file has no such line, you have to draw a path around each sticker in Illustrator or CorelDRAW, assign the right spot color and check every shape. With dozens of shapes or complex outlines this is slow and easy to get wrong.
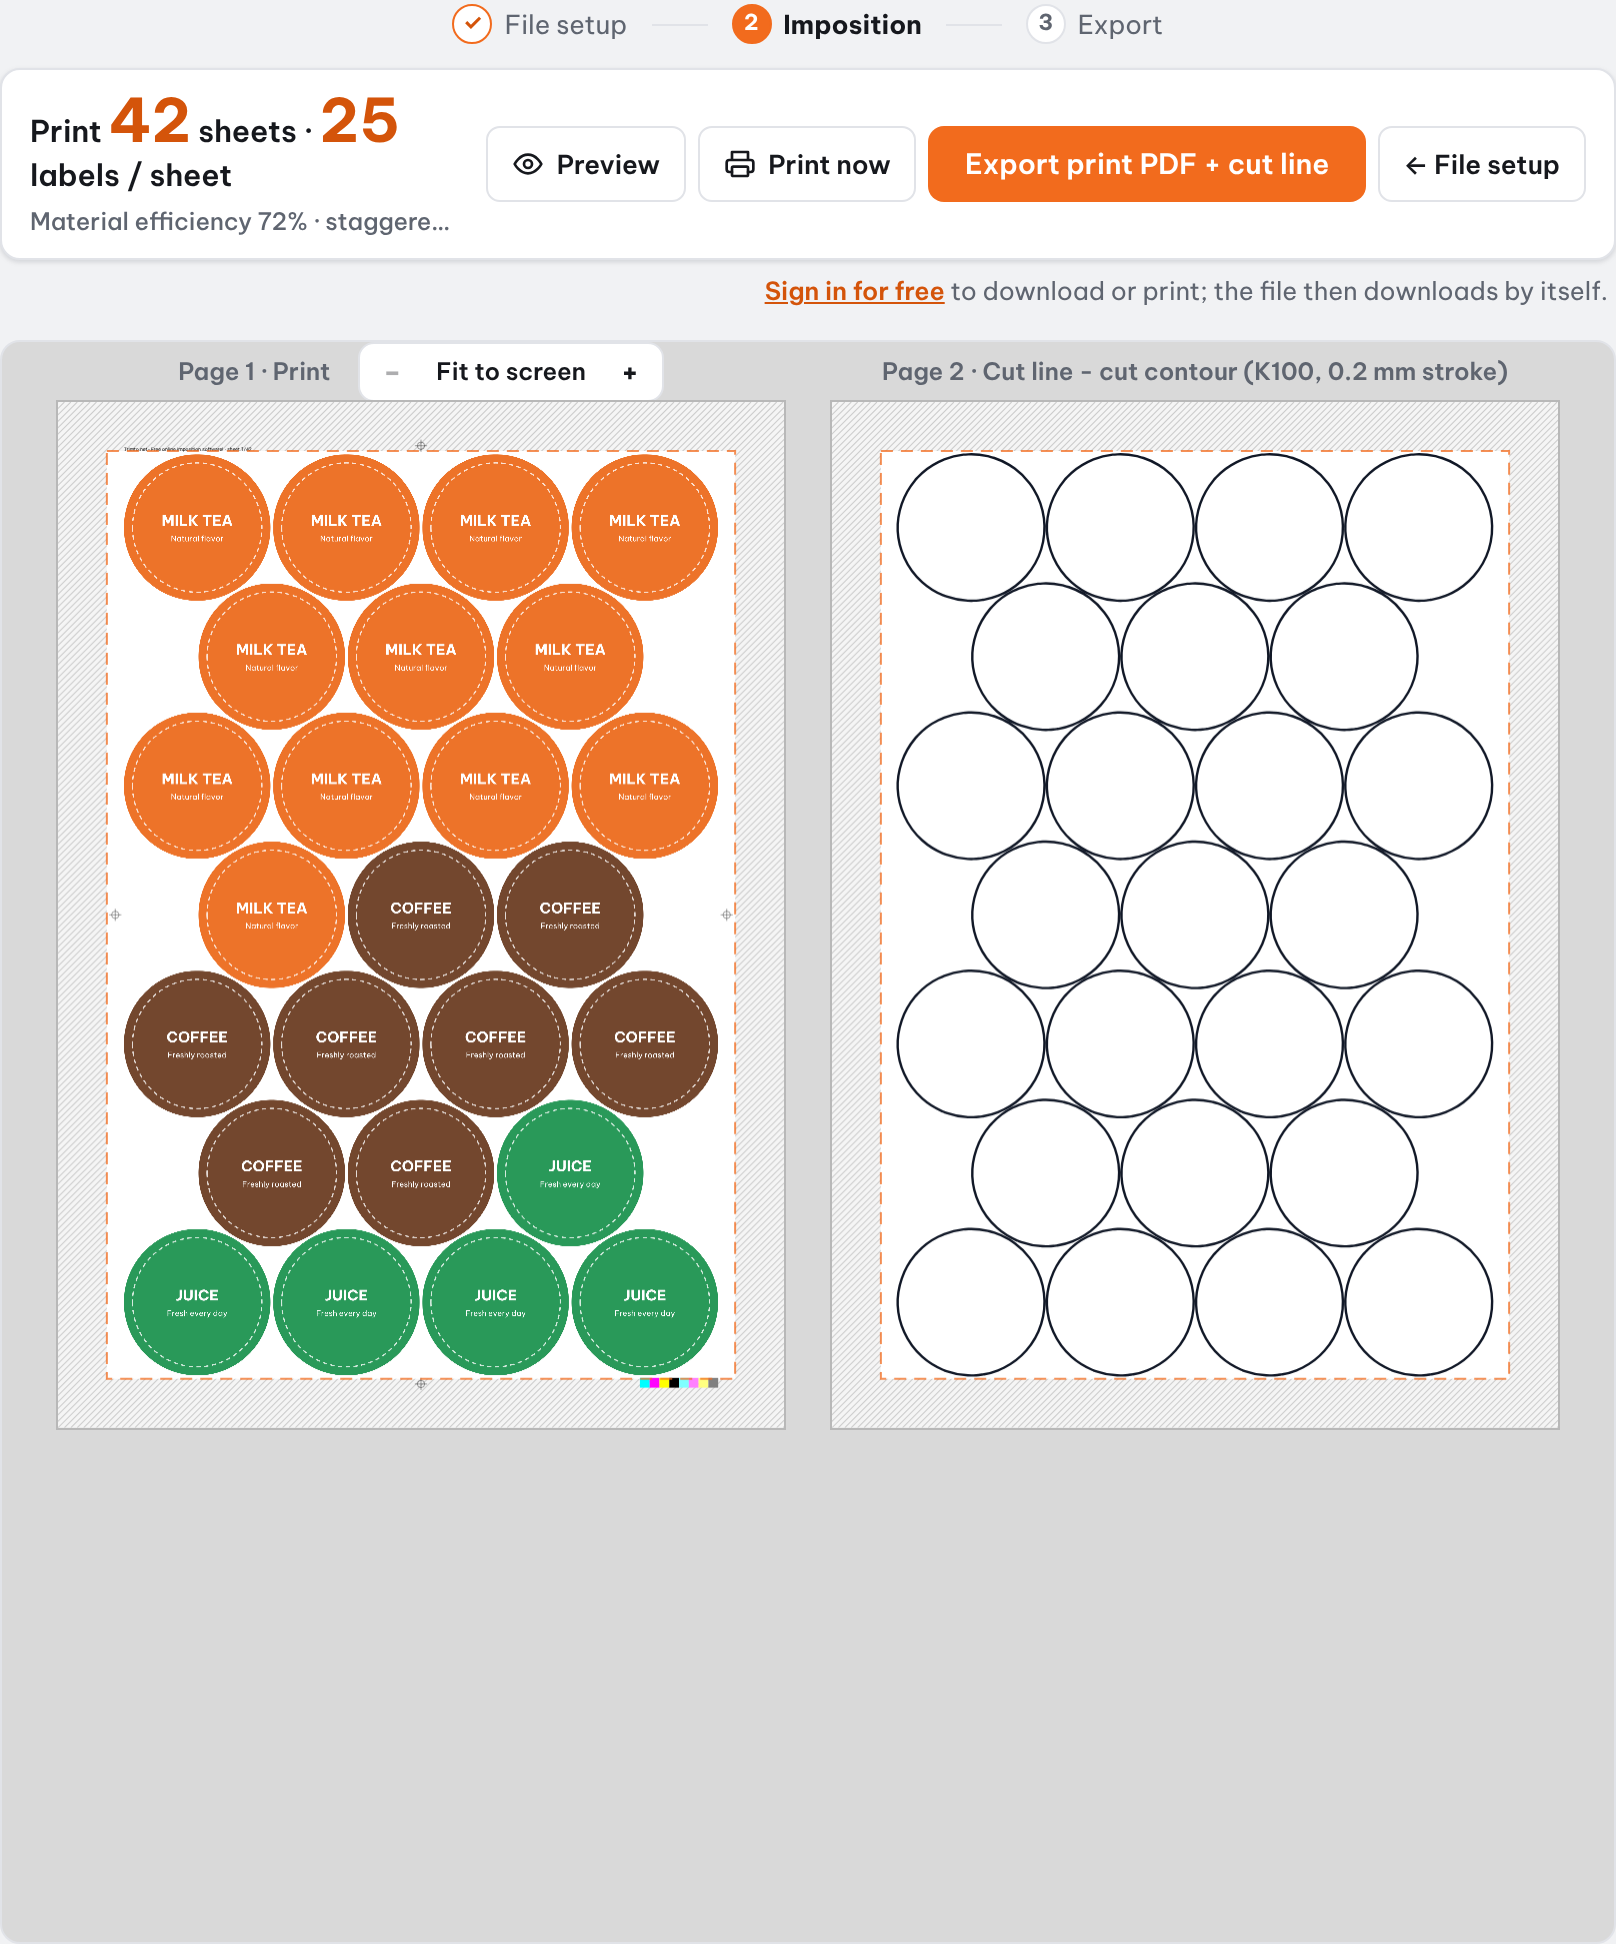
Two ways to export the cut line
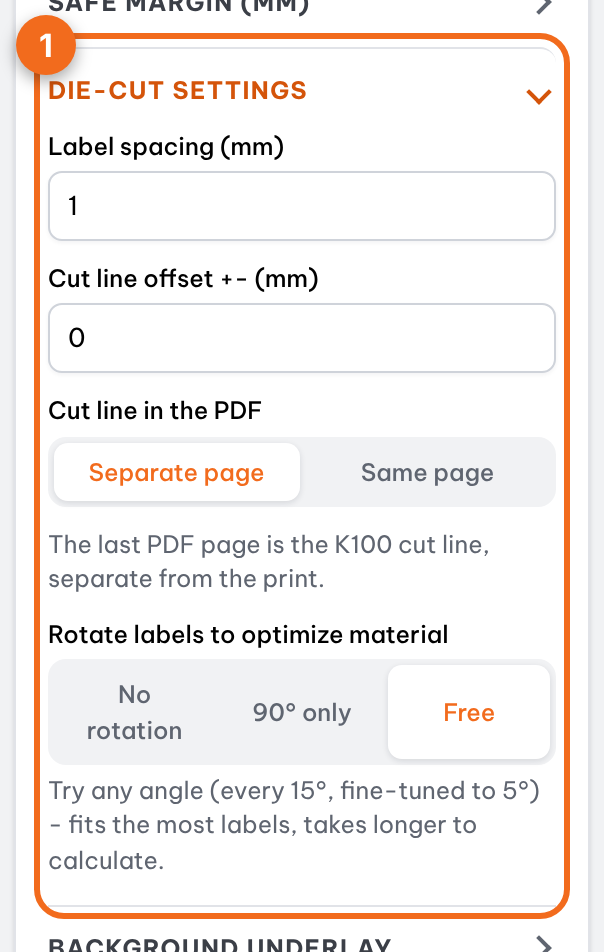
Both options share the same origin as the print, so the cut matches every shape. Do not change the paper size or scale when printing: print at 100%.
| Export option | Where the cut line is | Use it when |
|---|---|---|
| CutContour spot color on the same page | On the print page itself, as a CutContour spot color (name can be changed), overprint, on its own layer | Print-and-cut machines: the RIP recognizes the CutContour line and cuts along it |
| Separate cut page | The last page of the PDF: a K100 line, 0.2 mm, same size and position as the print | Die cutters or vinyl cutters that only read cut vectors; the print goes to the printer on its own |
Outline tracing, holes and white backgrounds
Trimto traces the outer outline of each shape to build the cut line. Empty areas inside, like a hang hole, become cut-out holes. For PNG with a transparent background the outline follows the visible artwork. For PNG or JPG with a white background, turn on "Remove white background around label" so the cut hugs the artwork instead of following a rectangular box.
Each design in the left column shows its number of cut regions and holes, so you can check it quickly before exporting.
Cut offset: cut inside or outside the outline
Cutters have small tolerances. If the artwork has bleed, cut on the edge or slightly inside so no white edge shows; if you want a white border around the sticker, move the cut outward. Set the cut line offset in mm: a positive value moves the cut outward, a negative value inward. Cut one test sheet before running the whole job.
Nest tightly to save vinyl
With many shapes, Trimto tries several arrangements and rotations to fit the most on one sheet; when two arrangements give the same count it picks the one with fewer rotation directions. When you set a quantity, the result is always enough or more, never short.
Step-by-step guides
Further reading
FAQ
- Is CutContour a file format?
- No. CutContour is the name of a spot color inside a PDF. The machine RIP treats a line with that name as the path to cut and does not print it with ink.
- Is the Trimto CutContour generator free?
- Yes. Outline tracing, cut offset, nesting and PDF export are free with no watermark. Files are processed in your browser and never uploaded to a server.
- Does it work with transparent PNG?
- Yes. The outline follows the visible artwork. For PNG or JPG with a white background, turn on "Remove white background around label" so the cut hugs the artwork.
- My machine uses a spot color name other than CutContour. What now?
- Under "Cut line in the PDF" choose "Same page", then type the spot color name your machine software expects into "Spot color name"; leave it empty for CutContour. Or choose "Separate page" and assign the K100 0.2 mm line as the cut path in your machine software.
- Will the cut line match my print?
- Yes, if you print at 100% scale. The cut line and print share the same origin; printing at a different scale or changing the paper size will shift them apart.