
How to die-cut nest labels: cut lines and spacing
User guide contents ↓Die-cut nesting is designed for labels, stickers, and vinyl decals of any custom shape (round, hexagonal, contour-cut around logos) cut on a die-cutter or vinyl cutter. Trimto automatically generates the cut line along the outer contour of each label—no manual drawing required.
Overview, use cases and the ready-to-use workspace: die-cut sticker nesting online.
Select Die-cut nesting at the top of the left column (during File setup or imposition).
Settings
In the right column, expand Die-cut settings (collapsed by default):
| Setting | Description | Recommendation |
|---|---|---|
| Label spacing | Gap between the cut lines of two neighbouring labels | 1–3 mm |
| Cut line offset +- | Moves the cut line outward from the artwork edge (negative values pull it inward) | 0–0.5 mm |
| Cut line in the PDF | Separate page or Same page (see below) | Depends on your cutter software |
| Rotate labels to optimize material | No rotation / 90° only / Free | Free fits the most items |
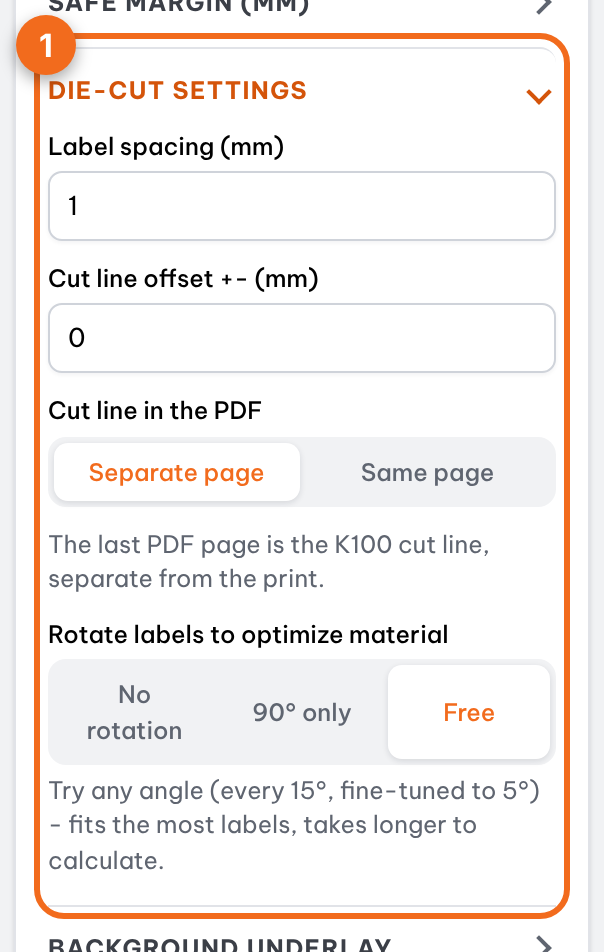
Free also tries angled rotations (every 15°, then fine-tuned to 5°), so it takes longer to calculate, but it usually packs noticeably more labels onto each sheet.
How cut lines are generated
- The cut line follows the outer contour of the label. Text and graphics resting on the background are not cut.
- Empty areas inside the label (such as hang holes) are cut as cutouts.
- For PNG or JPG images with a white background: turn on Remove white background around labels so the cut line hugs the artwork closely.
Each design in the left column displays the number of cut contours and cutouts for a quick check.
Separate page or same page
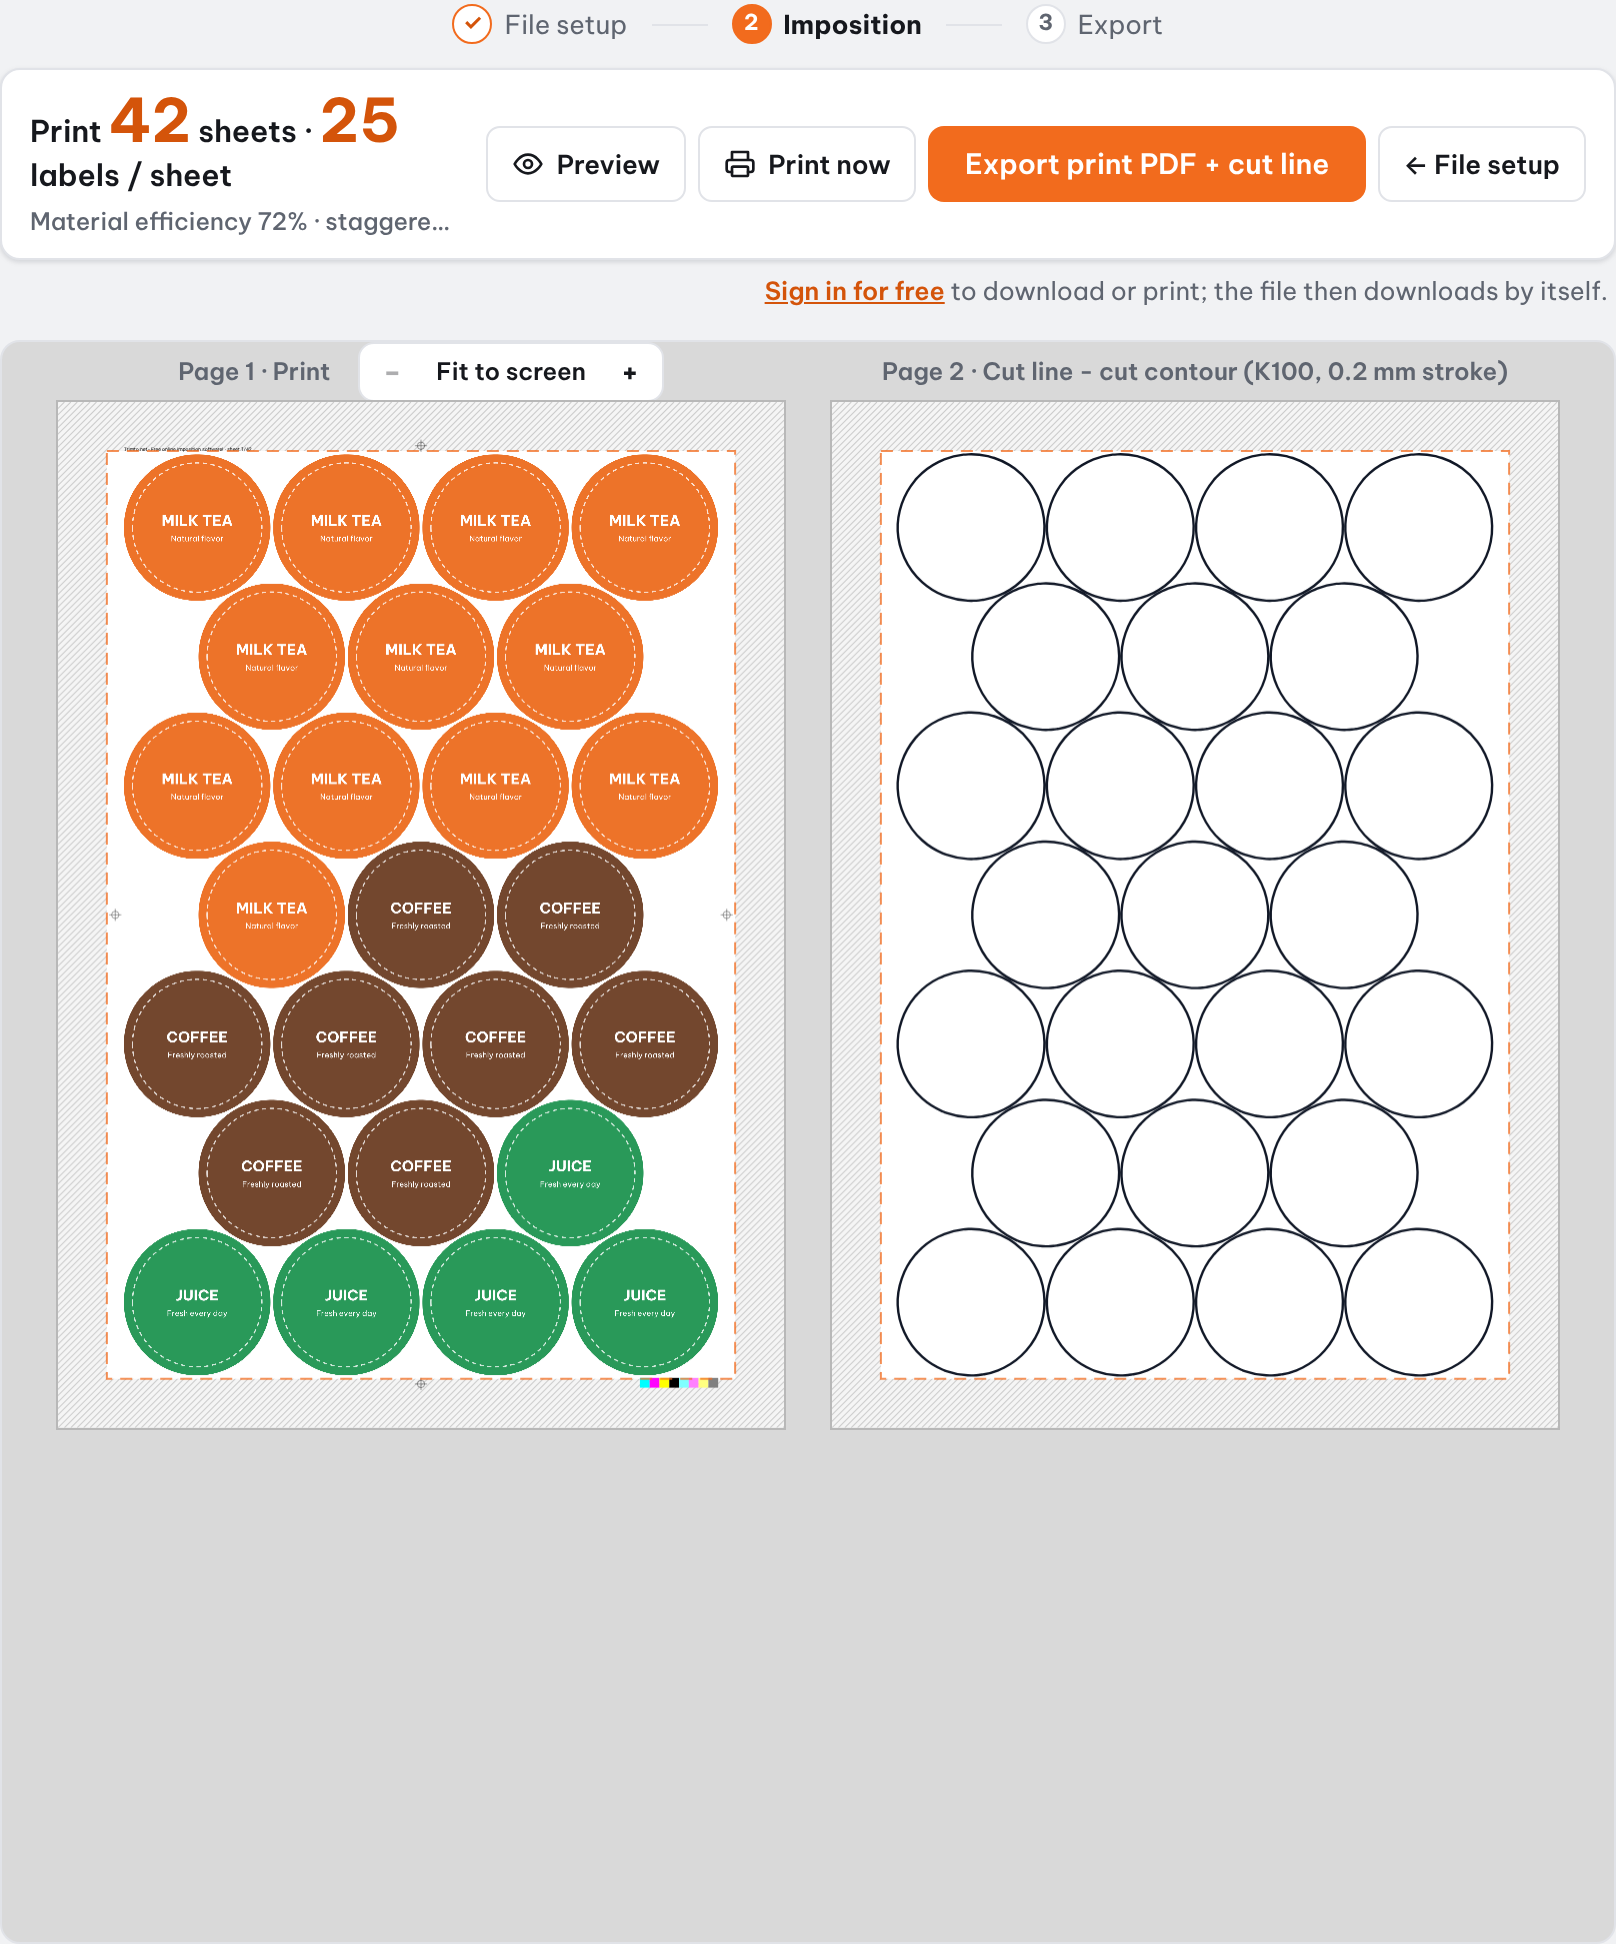
- Separate page (default): the PDF holds the print sheets first and one extra last page with only the cut line, a 0.2 mm black (K100) stroke at the same size and position. In the workspace the two are shown side by side. Choose this when your cutter software imports a cut path as its own file or layer.
- Same page: the cut line is drawn on top of the artwork in a spot color named
CutContour(you can rename it), set to overprint and placed on its own layer. Print-and-cut RIPs such as Roland VersaWorks recognize that spot color name as the cut path and do not print it. Change the name if your RIP expects another one, for exampleThru-cut.
The workspace preview always shows exactly what the exported file will contain. Details for each machine: Send a file to a die-cutter or plotter.
Choosing spacing and cut-line offset
- Spacing: a die cutter or cutting plotter needs a gap wide enough that the blade never touches the next label. 1–3 mm is safe; thin stock and small labels can go down to 1 mm, thick material or a weak knife should stay near 3 mm.
- Cut-line offset: the real cut drifts slightly from the drawn line. A positive offset (0.2–0.5 mm) pushes the cut outside the edge so it doesn't bite into the art; a negative offset pulls it inside, for cutting tight and removing white edges.
- Test one small sheet on your own machine first, then tune the numbers.
Which rotation mode
| Mode | When to use | Trade-off |
|---|---|---|
| No rotation | Labels with fixed text direction or print direction | Fits the fewest |
| 90° only | Allows 90°, 180° and 270° turns | Balances speed and count |
| Free | Odd shapes (flowers, animals, logos) where saving material matters | Takes longer, usually fits the most |
When label counts tie, Trimto picks the layout with the fewest orientations so the cutter and operators have an easier job.
Max per sheet vs. print by quantity
Sheet size, safe margin and saved setups work the same in both cut types; see How to step and repeat. The imposition method, also shared, decides how many labels you get.
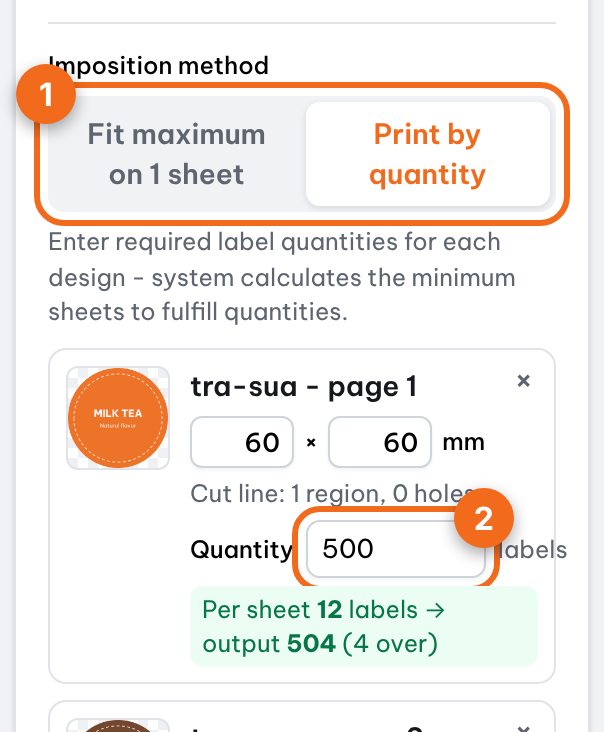
In the left sidebar under Imposition method:
| Option | When to use |
|---|---|
| Fit maximum on 1 sheet | You want to know how many copies of a design fit on one sheet, and will print as many sheets as you need yourself. |
| Print by quantity | You need an exact number of each design (for example 500 of A and 200 of B). |
With Print by quantity, type the Quantity for each design and click Confirm & impose. Trimto works out the fewest sheets that give at least that many of every design (never fewer) and shows the labels per sheet and the total you will get.
Fill empty spots with spare labels (no extra sheets), on by default, puts extra copies into slots that would otherwise stay blank. You get a few spares for free and use no extra paper.
Tip: Try both Portrait and Landscape, check the stickers-per-sheet count at the top of the center pane, and pick the orientation that fits more.
Common mistakes
- Cut line doesn't hug a PNG: a white-background image hasn't been separated; turn on Remove white background around label. A PNG with a transparent background works as is.
- Labels touch each other: spacing is too small for the machine's tolerance; raise it to 2–3 mm.
- Unexpected cut-out holes: empty areas inside a shape (the O in a logo, a handle) are cut as holes; check the hole count shown on each design.
- Fewer labels per sheet than expected: check the sheet size, safe margin and spacing first, then try Free rotation. Trimto never prints fewer labels than the quantity you entered; it adds sheets instead.
FAQ
Where does the cut line go in the PDF? With Separate page, on the last page as a 0.2 mm K100 black stroke at the same size and position as the print pages. With Same page, on every print page as a CutContour spot-color stroke. See Send a file to a die-cutter or plotter.
Should round or rounded-square labels use die-cut nesting? You can, but for plain rectangles step & repeat is faster and more economical.
Further reading
- Roland DGA, File preparation for print/cut production: how a print-and-cut workflow uses a CutContour spot color.
- Wikipedia, Kiss cutting and Die cutting: the two ways stickers are cut.
- Trimto Learn: Kiss cut vs die cut stickers.