
Kiss cut vs die cut stickers and CutContour lines
A kiss cut goes through the sticker face and adhesive but leaves the backing whole; a die cut goes through every layer, so each sticker becomes a separate piece. Both follow a cut line in the file, most often a spot color named CutContour.
Stickers and labels are usually a stack of layers: a printed vinyl or paper face, an adhesive, and a backing sheet. The two common ways to cut them differ in how deep the blade goes.
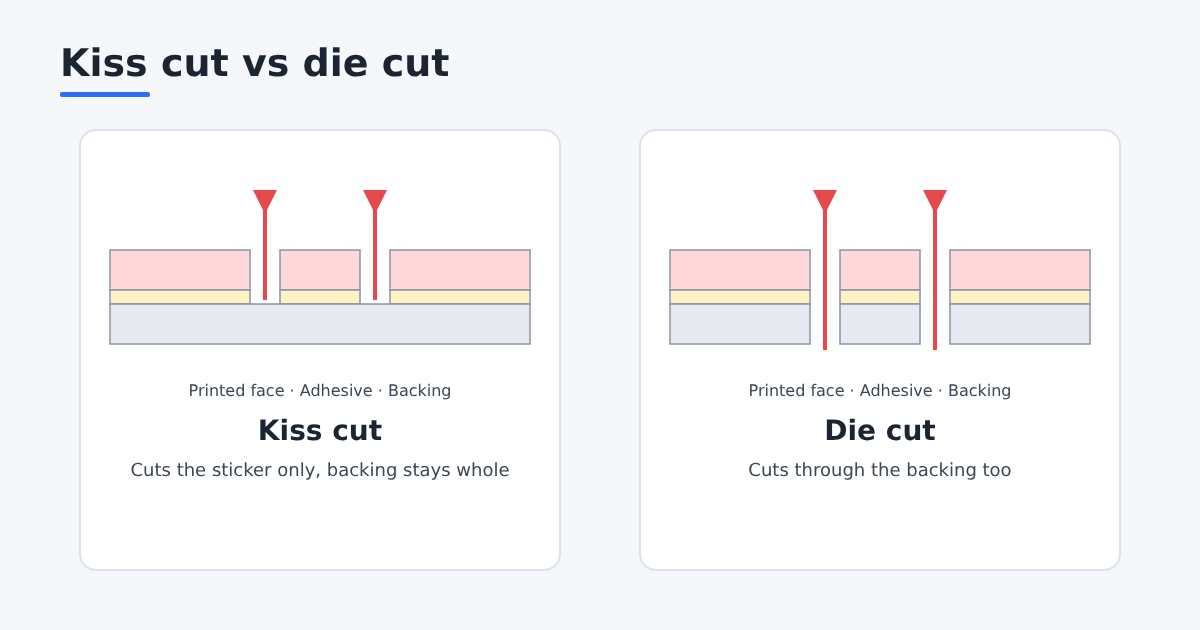
Kiss cut
The blade cuts only through the printed face and adhesive, leaving the backing intact. You get a sheet (or roll) of stickers that peel off one at a time. Good for:
- sticker sheets and packaging labels people peel by hand
- labels applied from a roll
- small runs where cutting through the backing is not needed
Die cut
The blade cuts through the face and the backing, so each sticker comes out as a separate piece, with the backing cut to the same shape. Good for:
- single stickers handed out loose, shaped to a logo
- stickers that must be stacked or mailed separately
Note that "die cut" can also mean cutting with a physical steel die on a press, while short runs are usually cut by a plotter or digital cutter. Which depth a job gets is normally decided by the cutter's blade pressure setting, not by the artwork, so tell your printer which result you want.
Side by side
| Kiss cut | Die cut | |
|---|---|---|
| Blade depth | Face and adhesive only | Face, adhesive and backing |
| What the customer gets | A sheet or roll, stickers peel off | Loose stickers, each with its own backing |
| Backing shape | Rectangle of the whole sheet | Same shape as the sticker |
| Peeling | Easy, the backing edge is exposed around each sticker | Harder on small stickers, often needs a crack-back slit on the back |
| Space between stickers | Can be small, a few millimetres | Usually larger, so the cutter can separate the pieces cleanly |
| Speed on a plotter | Faster, one light pass | Slower, deeper or double passes |
| Good for | Sticker sheets, roll labels, planners | Giveaways, laptop stickers, merch packs |
Many shops also sell a mix: stickers kiss cut on a sheet, and the sheet itself die cut to a custom outer shape. It looks like a die-cut sticker pack but keeps all pieces together.
How print and cut lines up
On a digital print-and-cut workflow the sheet is printed first, then moved to a cutter. The cutter does not know where the print landed, so the file carries registration marks, small squares or circles at known positions. A camera or optical sensor on the cutter reads them, corrects for small shifts or rotation of the sheet, and then follows the cut line. Leave the corners and edges of the sheet free for these marks and keep the cut line at least a few millimetres from them. Each cutter brand has its own mark system, so use the template from your RIP or cutting software.
Common file problems
- Open or broken paths. A cut line with a gap makes the blade stop short or jump. Always use one closed path per sticker.
- Too many points. A traced outline with thousands of tiny segments slows the cutter and gives a jagged edge. Smooth the line first.
- Tiny holes and sharp spikes. Holes inside letters and thin spikes tear when people peel the sticker. Fill small holes and round thin parts of the outline.
- Cut line set as a process colour. If the line is CMYK instead of a named spot colour, it prints instead of cutting.
- White edge after cutting. No bleed under the cut line, or the cut line sits exactly on the colour edge. Offset the line and extend the colour.
Choosing for your job
- Selling planner or journal stickers: kiss cut sheets, several designs per sheet.
- Handing out logo stickers at an event: die cut, one sticker per piece.
- Product labels applied by a machine: kiss cut on a roll, with the gap the applicator needs.
- Small run printed at home on sticker paper: kiss cut with a desktop cutter, then trim the sheet by hand.
What a CutContour line is
A cutter needs a path to follow. In print-and-cut workflows that path is a vector line in the artwork, set as a spot color with a special name, most often CutContour. The RIP or cutting software reads any object with that spot color name as a cut line instead of printing it. The name your machine or software expects can differ, so check your RIP's documentation.
Good practice for cut lines:
- the line follows the outer outline of the sticker; offset it 1 to 3 mm outward only if you want a deliberate white border around the design
- keep bleed past the cut line, so a small cutting error never reveals blank material
- make the line a closed path; putting it on its own layer also makes it easy to check or hide (it is the spot color name, not the layer, that tells the RIP not to print it)
Making the cut line and nesting stickers
Drawing outlines by hand is slow. Trimto's CutContour generator traces the outline of each shape in your PDF, SVG or PNG, lets you offset it in millimeters and exports the cut line as a CutContour spot color or on its own page. Die-cut sticker nesting then packs many shapes tightly onto the sheet to save material.
Sources
- Wikipedia, Die cutting (web): die cutting and kiss cutting on label and sticker stock.
- Wikipedia, Spot color: how named spot colours differ from CMYK, the basis of a CutContour line.
- Roland DGA, File preparation for print/cut production: setting up a CutContour spot color for print-and-cut.