
Print layout: how to lay out labels, cards, pages
Print layout is how your finished designs sit on the sheet that goes through the printer: how many copies fit, which way they face, how much gap and bleed they need, and where the cut, fold and crop marks go. A good print layout saves paper, cuts cleanly and, for booklets, puts every page in the right order after folding.
Page layout vs print layout
The word "layout" means two different things in print work, and mixing them up causes confusion when you talk to a print shop.
- Page layout is design work: placing text, photos and logos on one page, in InDesign, Illustrator, Canva or CorelDRAW. The result is a single-page PDF per design, or one PDF with all the pages of a booklet in reading order.
- Print layout happens after that: placing those finished pages on a larger sheet (A4, A3, SRA3, 12 × 18 in, 13 × 19 in…) so they can be printed and cut, or printed, folded and bound. Printers also call it imposition.
This article is about the second one. If you want the theory behind it (press sheets, signatures, why page order changes), read what is imposition. Here we go product by product.
How each product is laid out
| Product | How it is laid out on the sheet | What to watch | Trimto tool |
|---|---|---|---|
| Square or rectangular labels, business cards, tickets | A grid of identical copies (step and repeat), single cut or double cut | Bleed per side, gap for a double cut, crop marks | Step and repeat imposition |
| Round, oval or custom-shape stickers | Shapes nested tightly, each with a cut line for the cutting plotter | Cut line offset, spacing, registration marks of the cutter | Die-cut sticker nesting |
| Numbered tickets, labels from Excel | Same grid, but every copy carries its own number or data row | Numbering by sheet or by stack (cut and stack) | Variable data printing |
| Booklets, catalogs, magazines | Pages in imposed order on both sides of a sheet, folded and stapled or glued | Page count in multiples of 4, cover printed separately, creep | Booklet imposition |
| Folded brochures (bi-fold, trifold, Z-fold) | Panels side by side, outside on one side, inside on the other | Fold-in panel slightly narrower, flip direction | Brochure imposition |
| Mini zines (4, 8, 16 pages) | All pages on one sheet, some upside down, folded and cut in the middle | Which row is rotated 180°, where the slit goes | Mini zine maker |
Labels and business cards: step and repeat
The simplest print layout: one design repeated in rows and columns. With a single cut the labels touch and one knife line separates two neighbors. With a double cut each label has its own bleed and there is a gap between them, so every edge is cut twice.
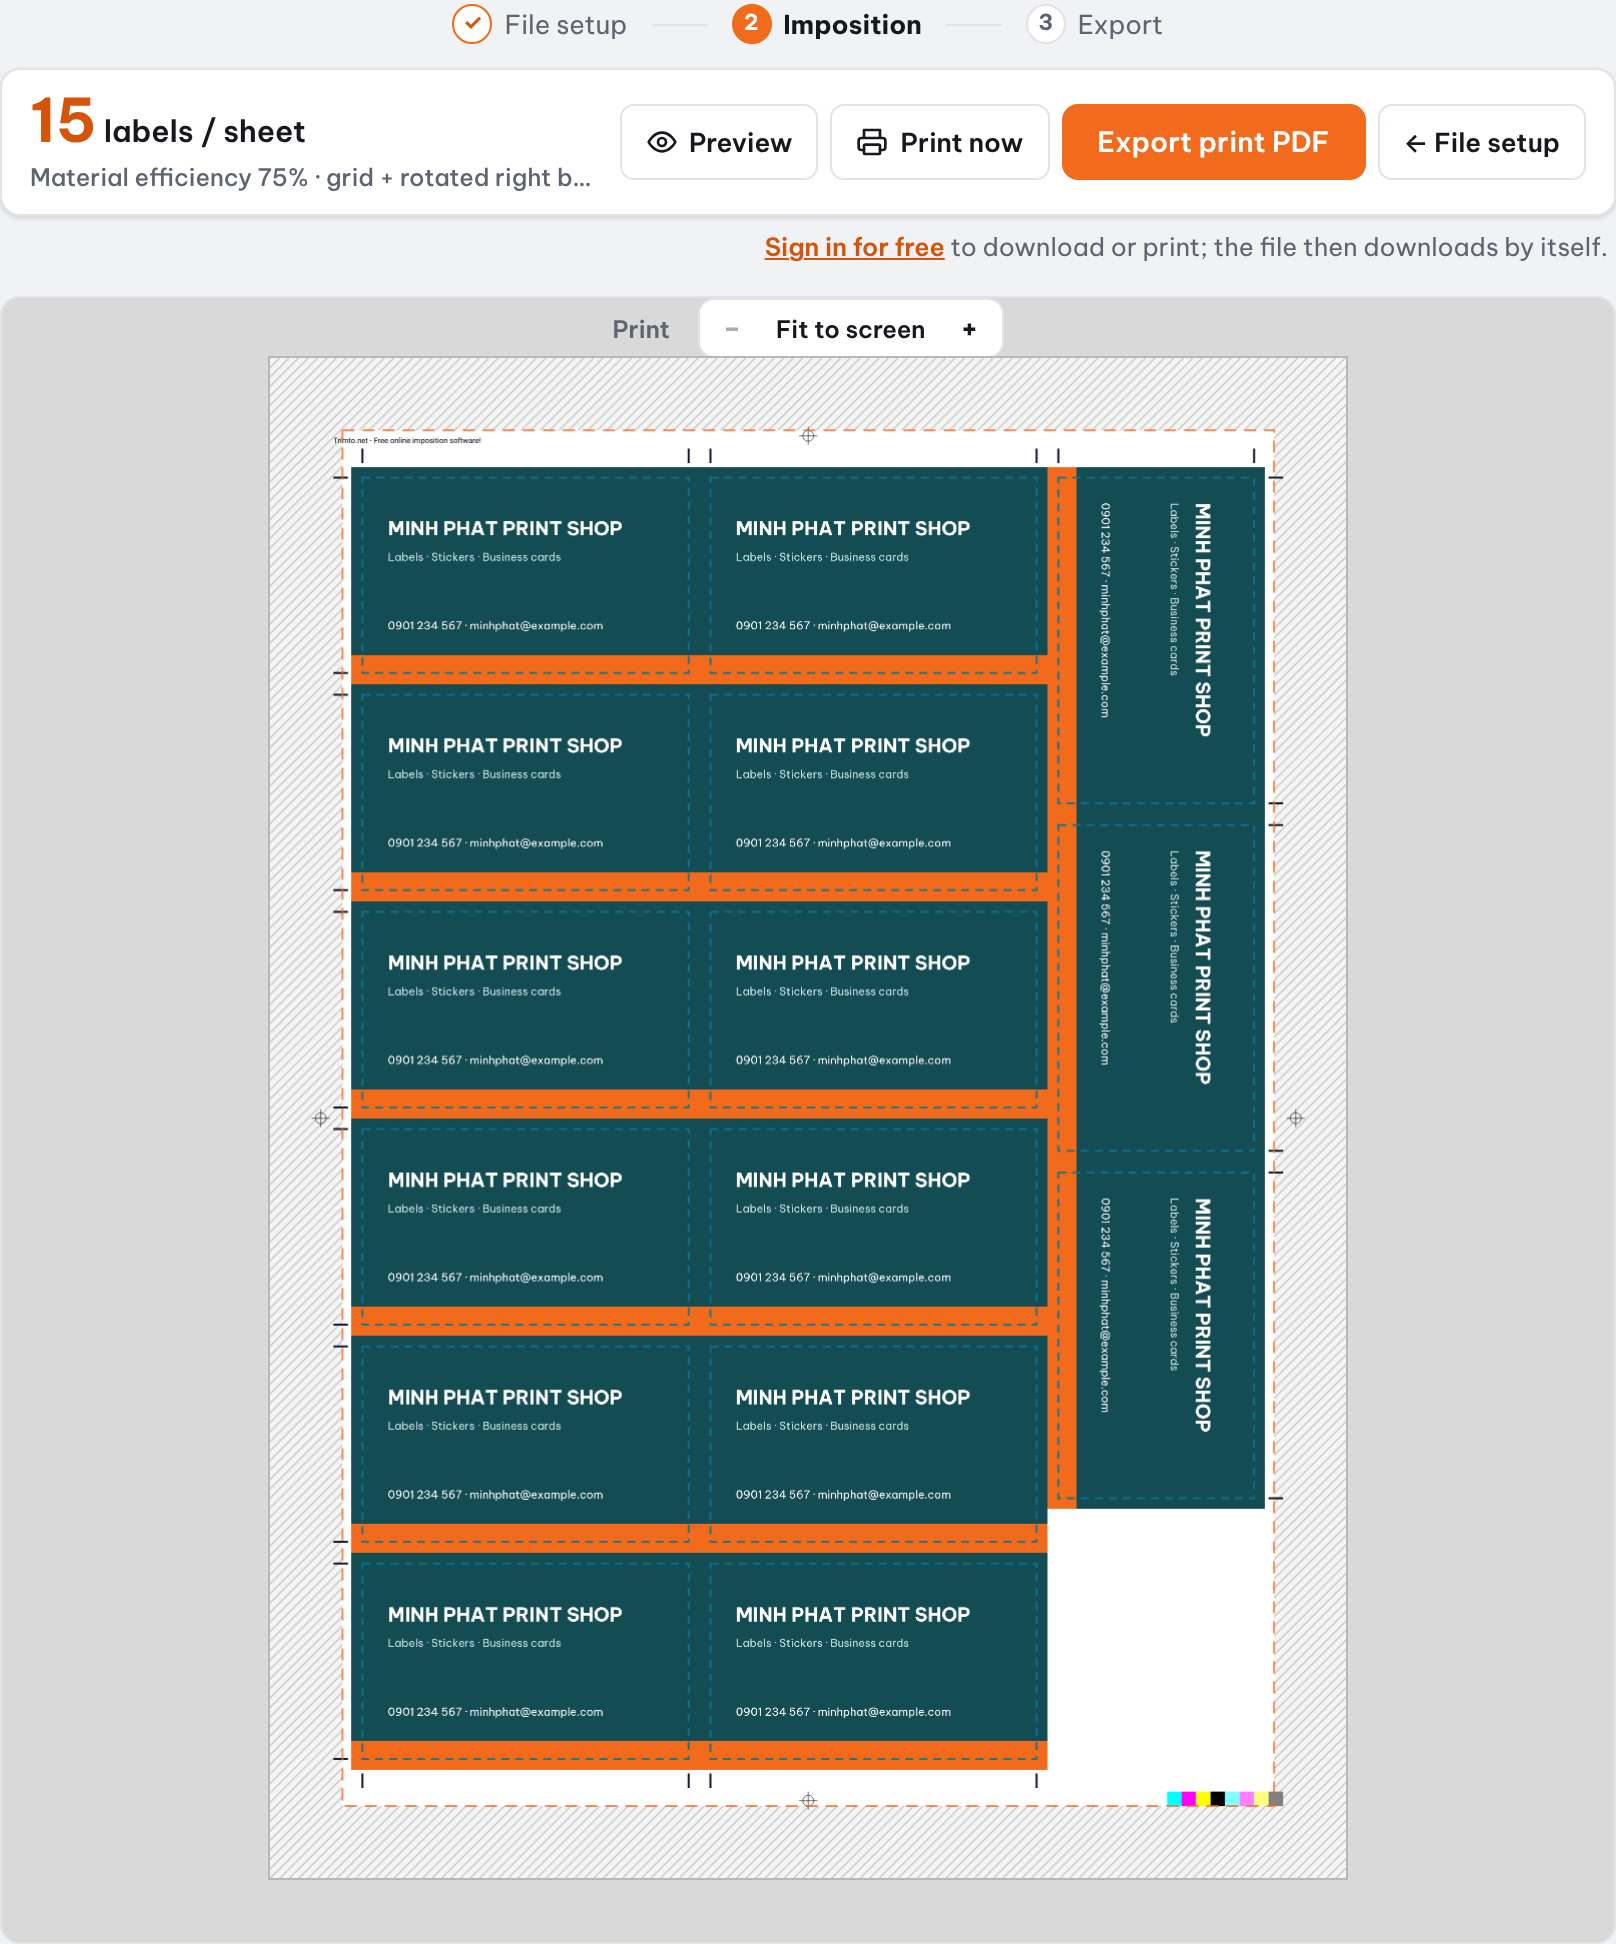
Before you start, decide the sheet size your printer actually feeds, and how much bleed your file has. To see how many pieces fit before opening any file, use the items per sheet calculator.
Stickers: a sticker sheet layout for the cutter
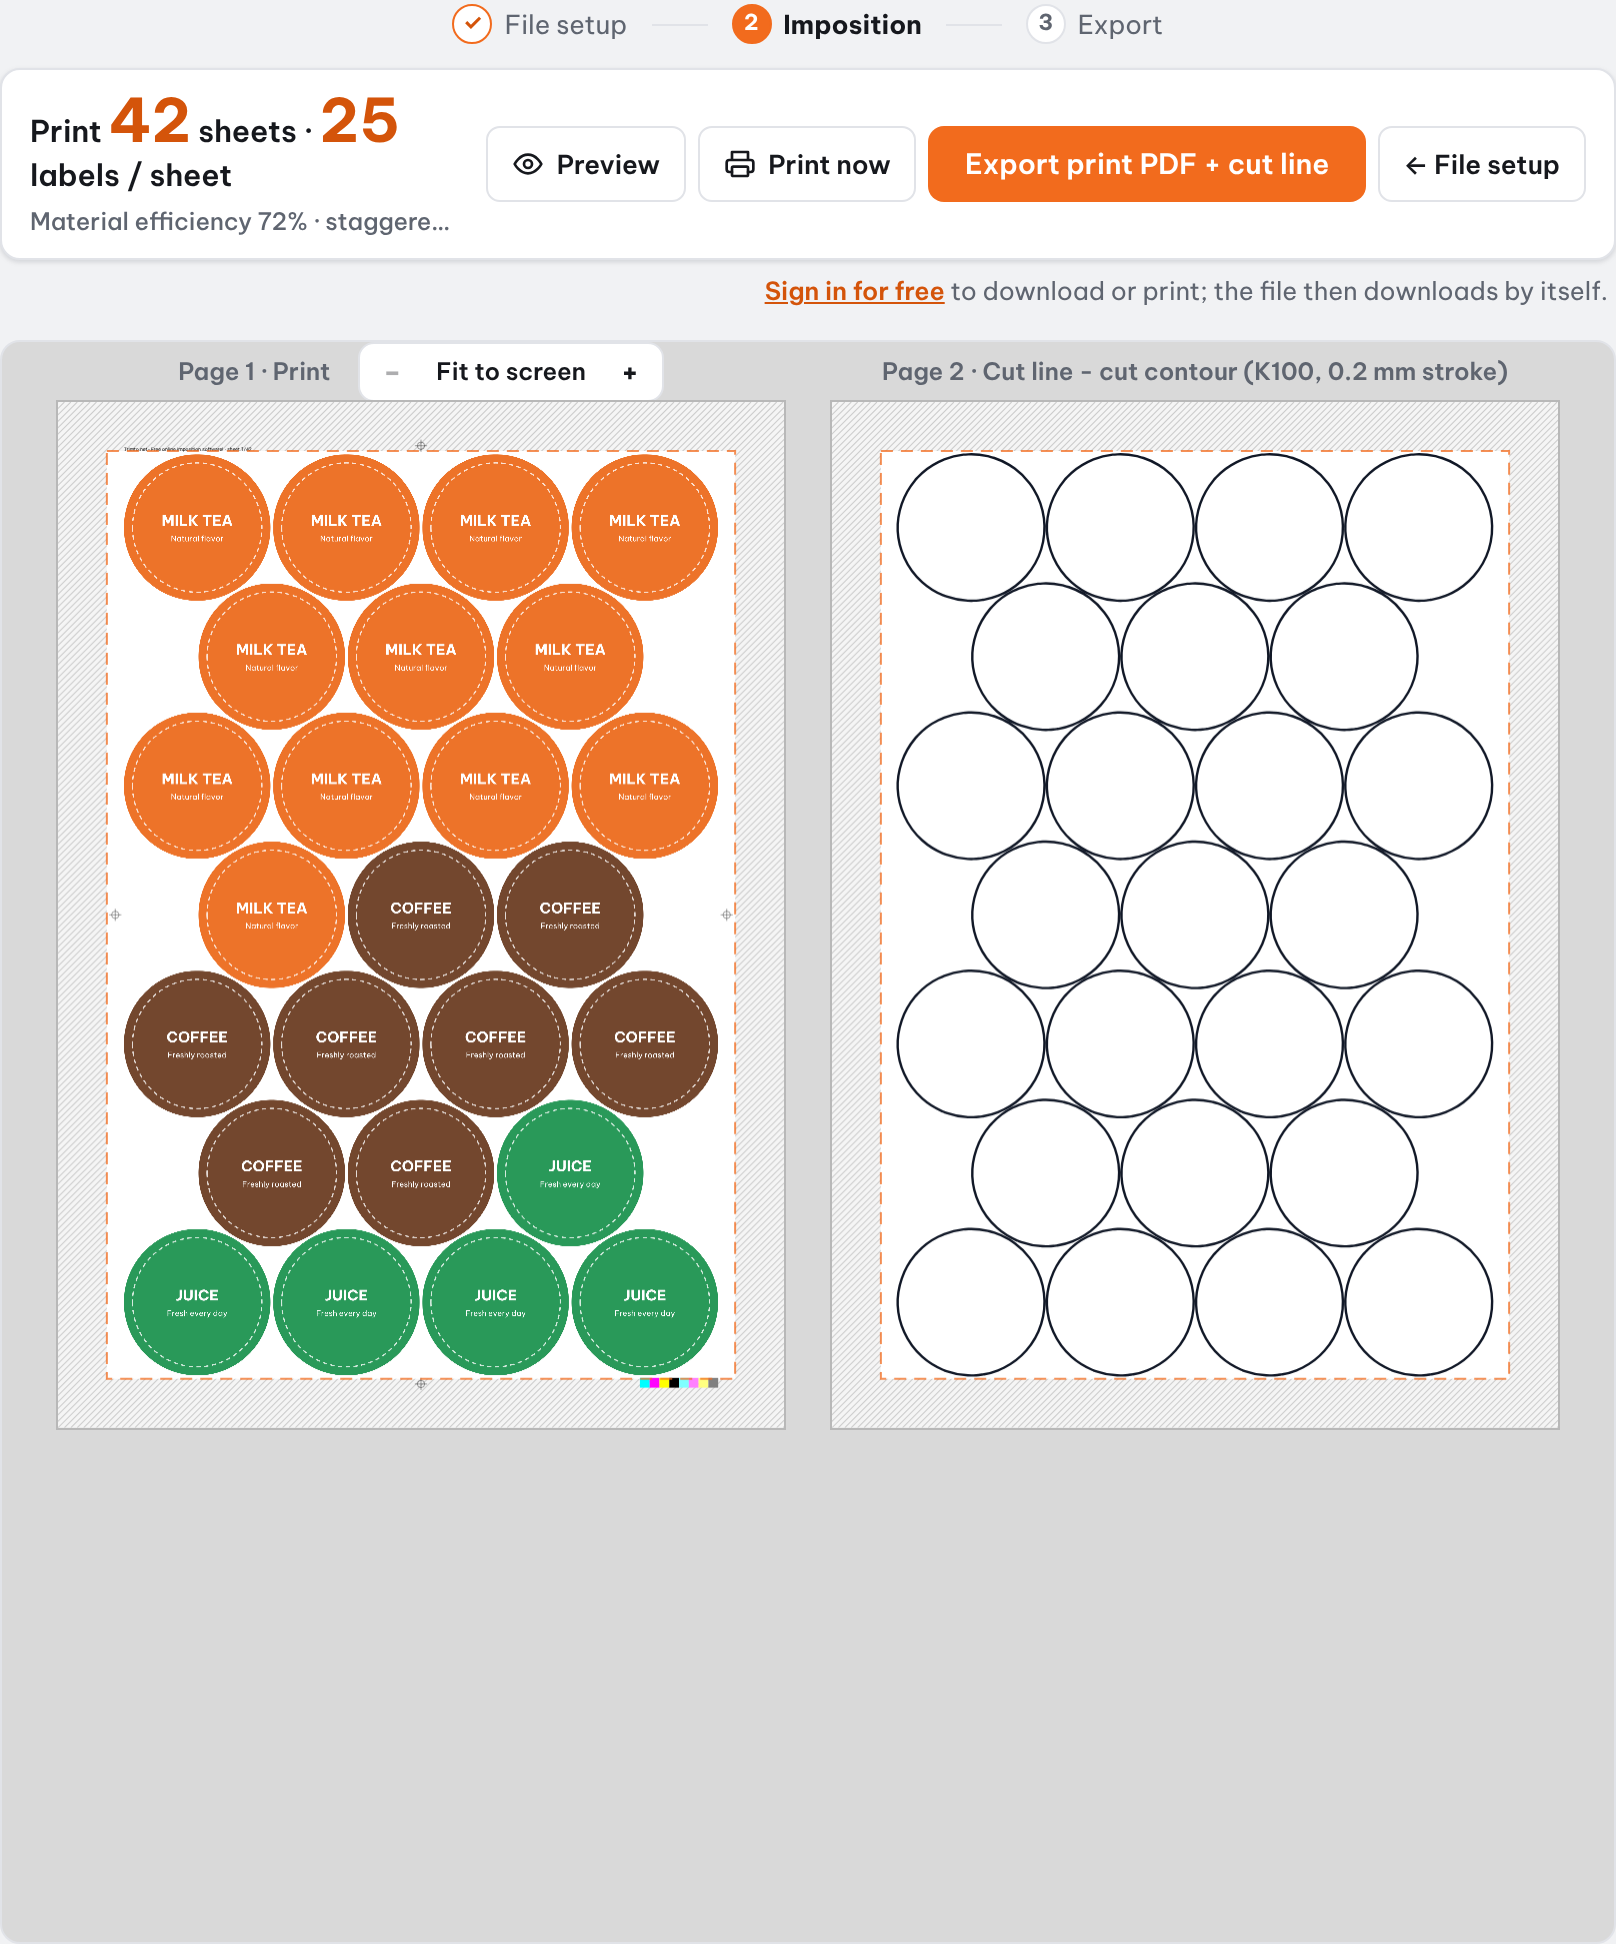
Round or custom-shape stickers do not fit in a grid without wasting paper. The layout nests them close together and exports a cut line (often a spot color named CutContour) that the cutting plotter follows. The usual checks are the distance between stickers and how far the cut line sits inside or outside the artwork.
More detail: kiss cut vs die cut stickers.
Booklets: a booklet layout is not in reading order
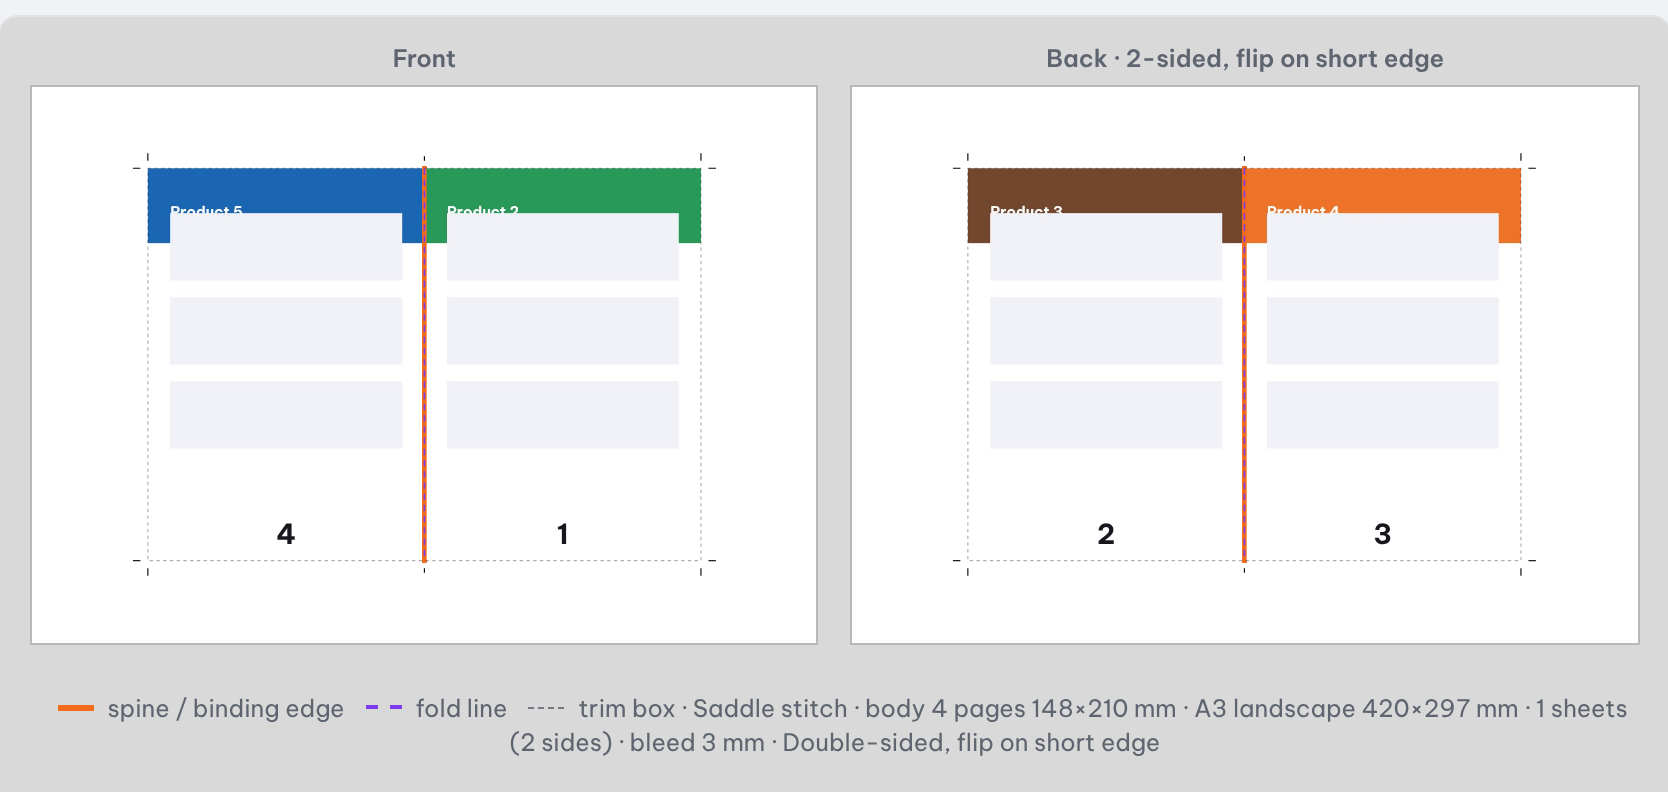
In a saddle-stitched booklet, page 1 shares a sheet with the last page, and page 2 with the second-to-last. The image at the top of this article shows an 8-page catalog: pages 4 and 1 on the front of the sheet, 2 and 3 on the back. Lay pages out in reading order and the folded booklet comes out scrambled. The booklet page order calculator shows the order for any page count.
A short checklist for any print layout
- Finished size of each piece, and the sheet size the printer feeds.
- Bleed in the file (usually 3 mm / 0.125 in) and a safe area for text.
- Single or double cut for rectangles, cut line for shapes.
- One-sided or two-sided, and which edge the sheet flips on.
- Marks: crop marks, registration marks, color bar, a job info line on the margin.
- Quantity: enough sheets to reach the quantity, never fewer.
The bleed, trim and safe area article explains point 2 in detail.
Doing the layout in Trimto
Trimto is a free print layout tool that runs in your browser; files stay on your computer. Drop a PDF, SVG or image into File setup, pick the cut type or binding, and the layout is built for you with marks on the margin. You can change the sheet size, margins, bleed and rotation and see the result at once, then export a print-ready PDF.
- Labels and cards: step and repeat imposition
- Stickers: die-cut sticker nesting
- Booklets and catalogs: booklet imposition