
How to print double-sided step and repeat
User guide contents ↓Double-sided printing is for business cards, tickets, tags and small flyers with artwork on both sides. Trimto places the back so that after you flip the sheet, the finished-size frames of the back line up exactly with the front, and exports each sheet as two consecutive PDF pages: odd pages are fronts, even pages are backs.
It is available in step and repeat imposition (single cut and double cut). Die-cut nesting does not have double-sided printing yet.
Steps
Open a file with both sides (for example a 2-page PDF: page 1 is the front, page 2 the back), choose Step & repeat and click Continue (see Open design files).
In the right column of the imposition step, open Cut settings, tick Print double-sided and choose the Flip type:
- Flip left-right: the sheet turns over around its vertical axis, like a book page.
- Flip top-bottom: the sheet turns over around its horizontal axis, like a wall calendar.
Printer drivers name the same thing by edge. Match them like this:
Sheet orientation in Trimto Flip left-right = Flip top-bottom = Portrait Flip on long edge Flip on short edge Landscape Flip on short edge Flip on long edge 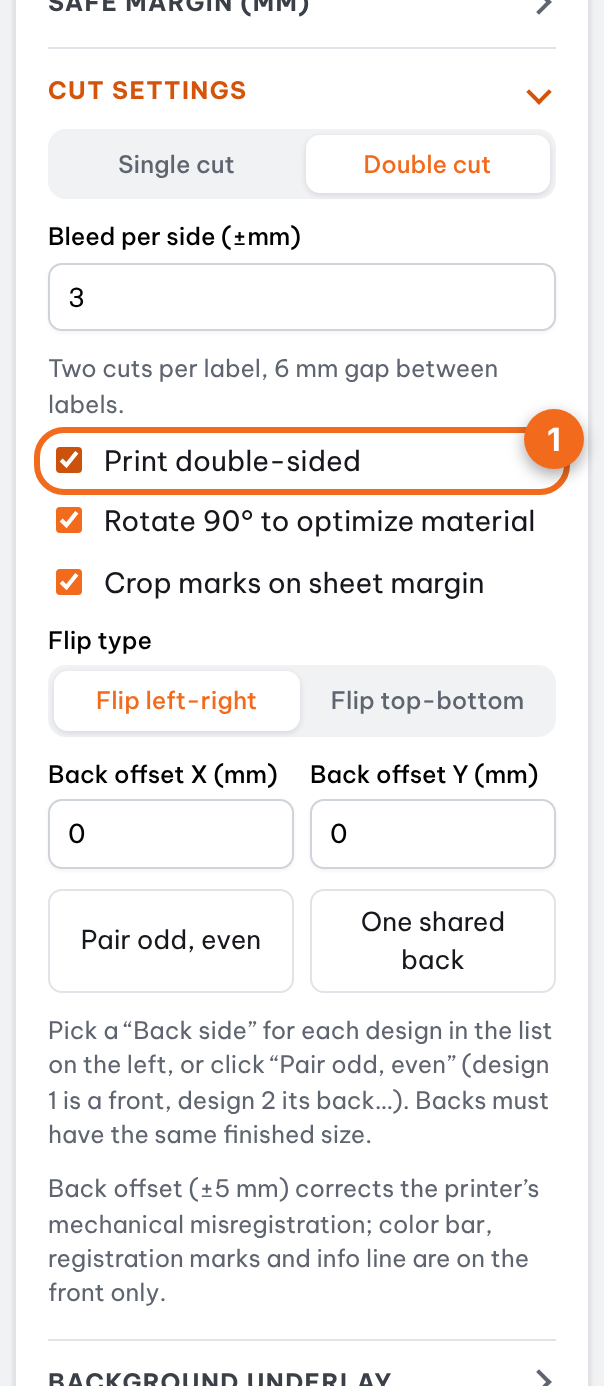
The "Cut settings" section: tick Print double-sided Pair a back with each design:
- Click Pair odd, even: design 1 is the front of design 2, design 3 the front of design 4… (a last odd design has no back).
- Or click One shared back: the last design becomes the back of every other design (for example many cards sharing one logo back).
- Or pick a Back side under each design in the list on the left.
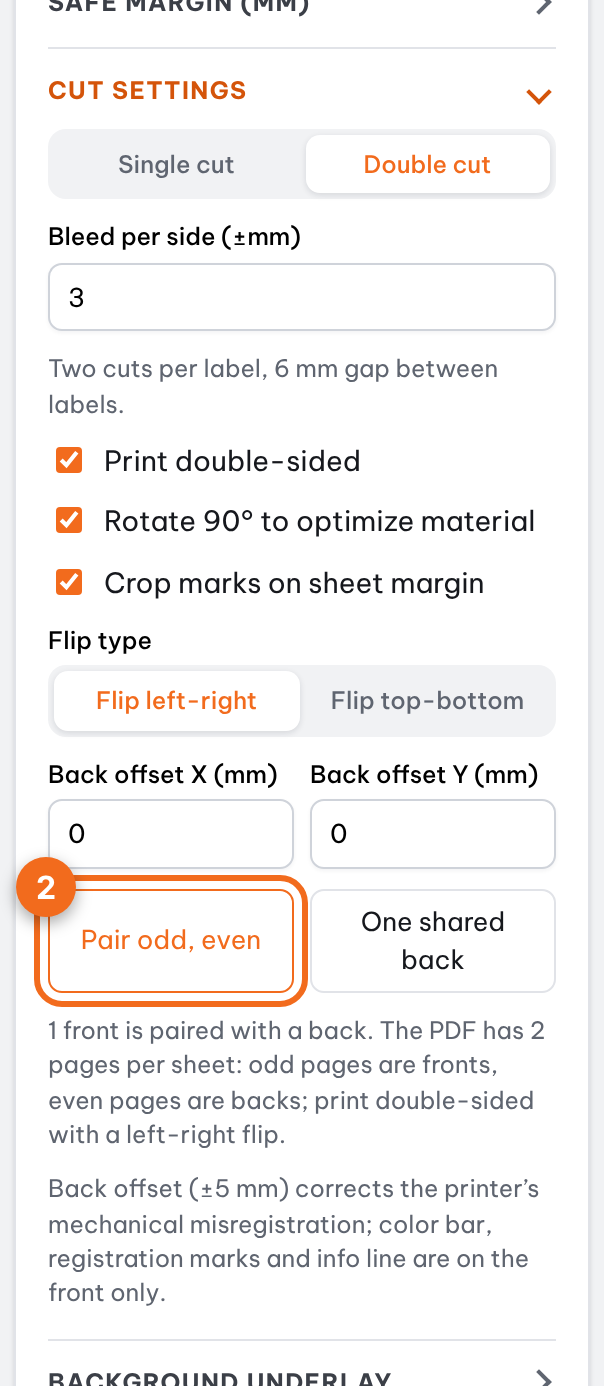
Pair odd, even 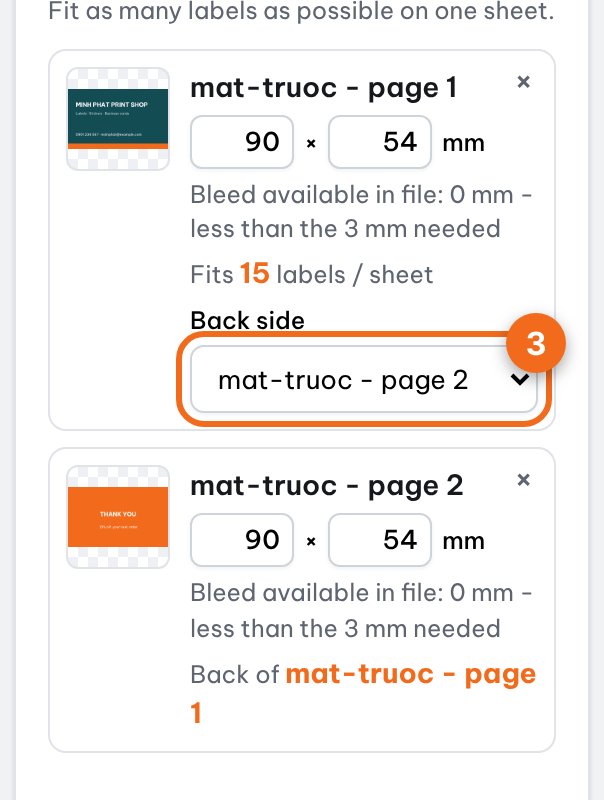
The "Back side" field under a front design; the back design says "Back of …" Click Back above the preview to see the back sheet. The positions of the labels are mirrored across the flip axis so each back lands behind its front; the artwork itself is never mirrored, and a label rotated 90° on the front is rotated to match on the back.
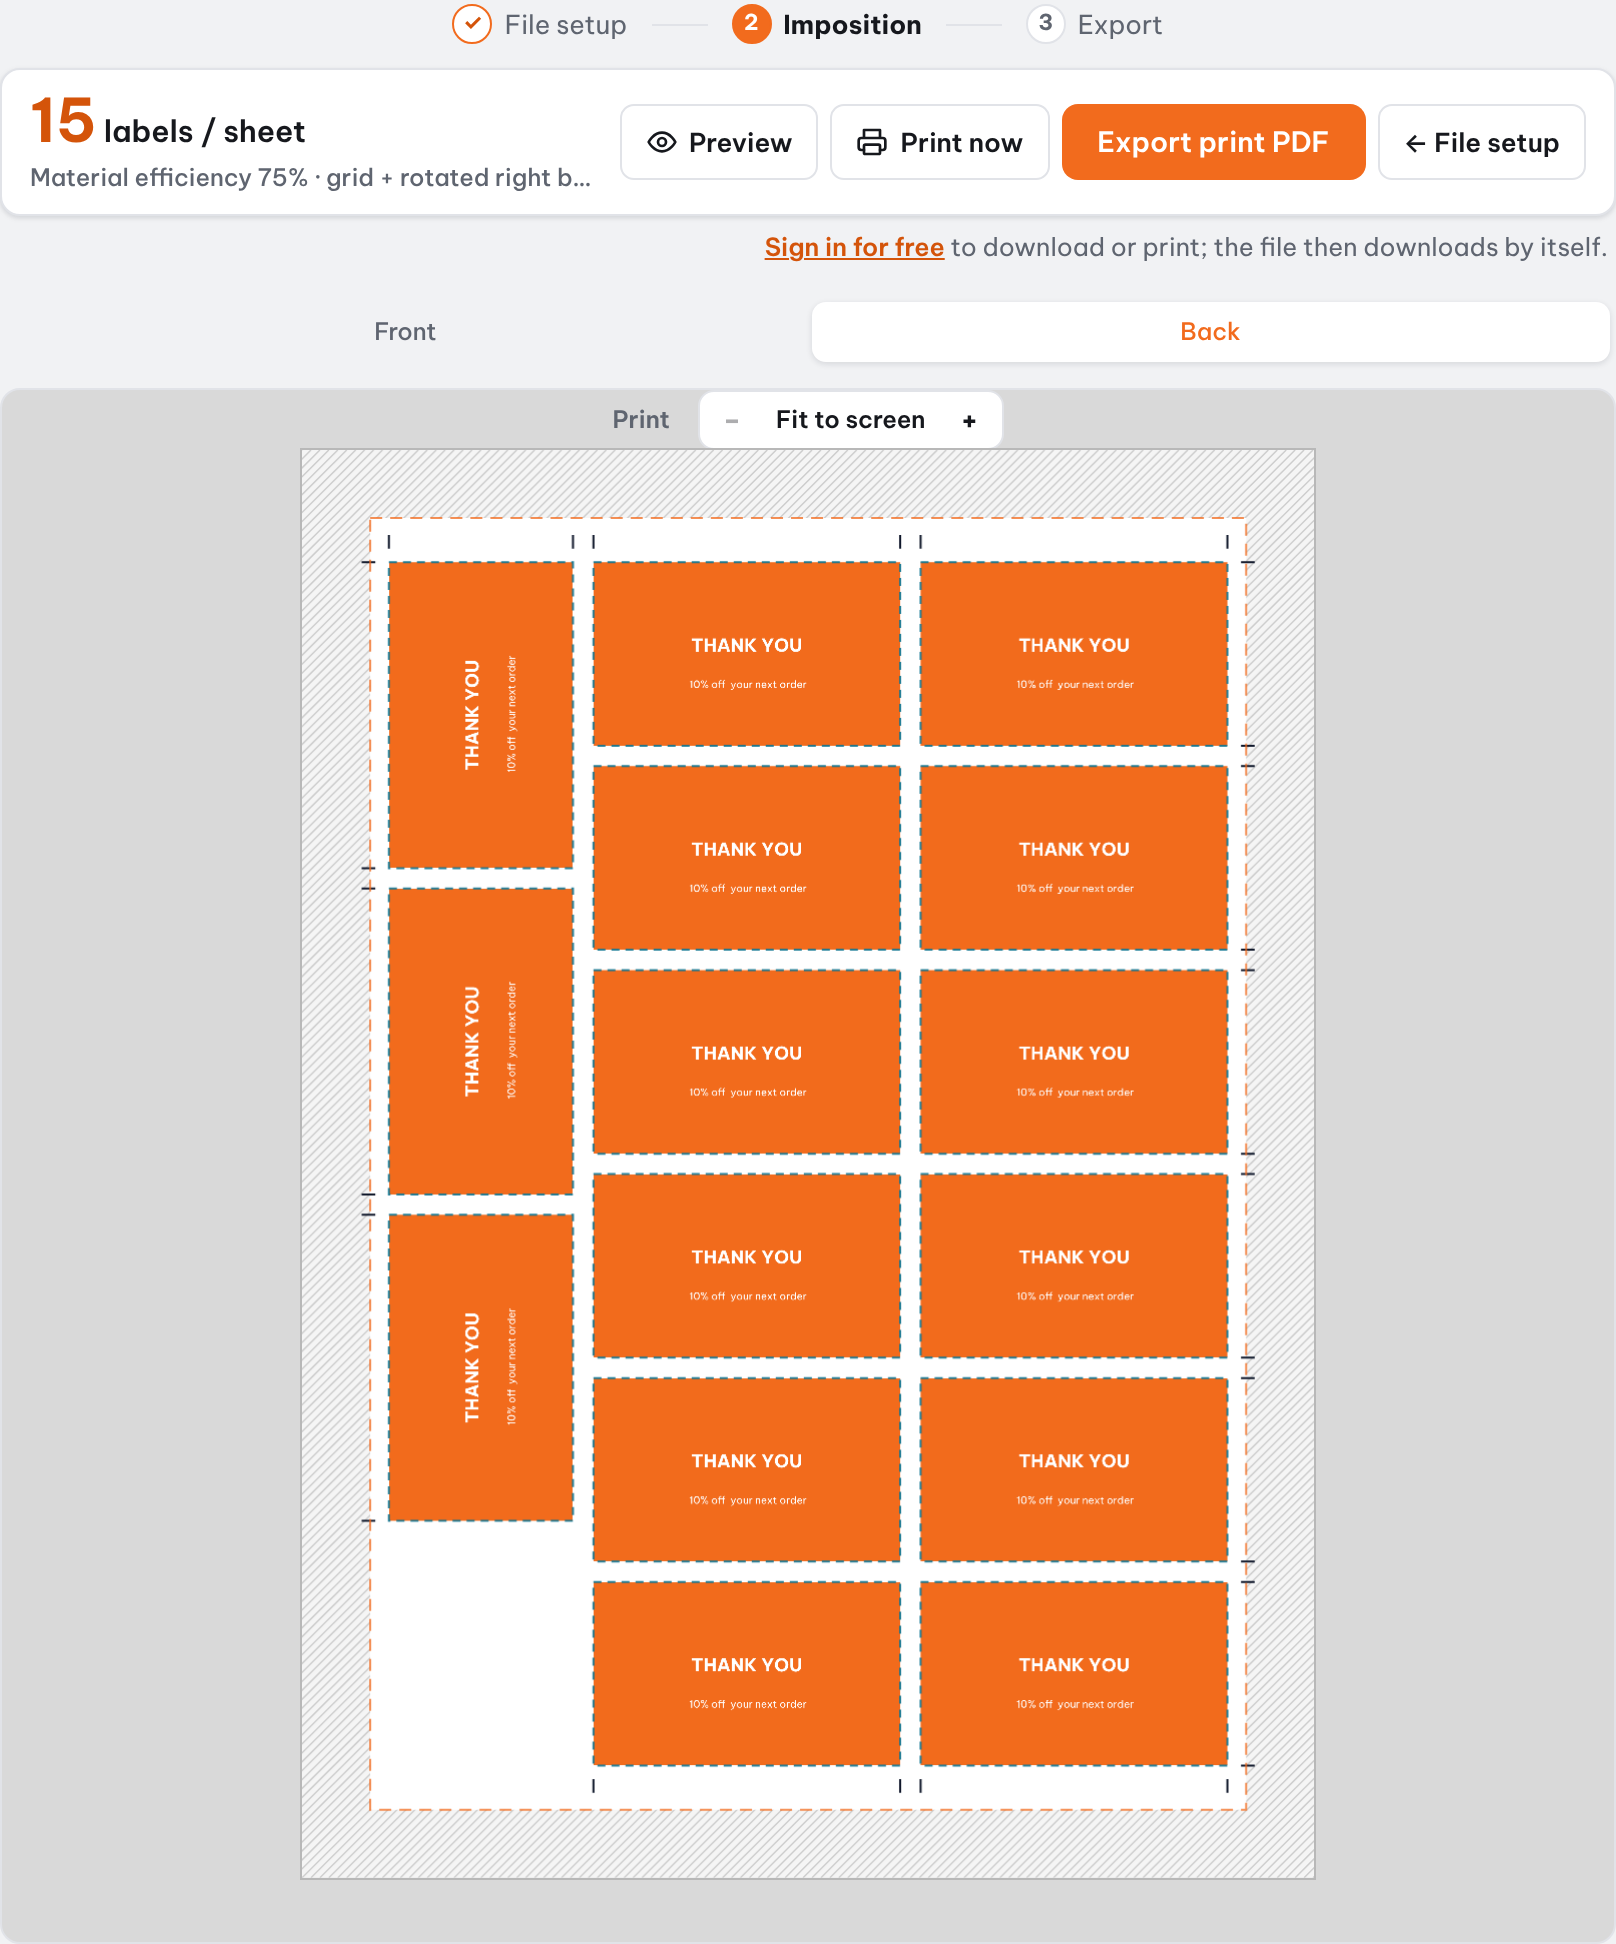
Back sheet preview Click Export print PDF. When printing, turn on your printer's two-sided (duplex) mode with the edge from the table above. On a printer without duplex: print the odd pages, put the stack back in the tray turned over the same way, then print the even pages.
Rules
- The back design must have the same finished size as the front (within 0.5 mm); otherwise Trimto shows an error and blocks the export.
- A design used as a back is not imposed and has no quantity of its own: quantities follow the fronts and the backs come along.
- A numbered series can only be a front, not a back. For numbered runs the front changes on every sheet while the back repeats; the PDF has 2 × the number of sheets in pages.
- A front without a back leaves the back of that label blank.
- Color bar, registration marks and the info line appear on the front only. Crop marks appear on both sides (flipped).
- Bleed, background underlay and mirror bleed apply to the back like the front.
Back offset
Printers often print the back a few tenths of a millimeter off the front. Print one sheet, fold it in half and hold it to the light, then enter the shift in Back offset X, Y (±5 mm, positive X moves right, positive Y moves down). The front stays unchanged.
Tip: always test-print one sheet on cheap paper to check the flip type and the back's text direction before a large run.
Common problems
- Back text is upside down after flipping: change the Flip type to match how your printer flips the sheet (long edge or short edge).
- No Double-sided section: you are in Die-cut nesting. Switch to Step & repeat at the top of the left column.
- A size mismatch error: the back differs in size from the front. Fix the size in File setup or pick another design.
Further reading
- Wikipedia, Duplex printing: long-edge and short-edge binding explained.
- Adobe Acrobat Help, Adjust page size for printing: print at actual size so front and back stay aligned.