
How to add bleed to a print file
User guide contents ↓Bleed is artwork that extends past the trim line (the finished edge), usually 3 mm or 0.125 in on each side; some printers accept 2 mm. A guillotine or cutter can drift by a fraction of a millimeter, and bleed makes sure the knife still lands on ink, so no thin white edge shows. Only designs whose color or image runs to the edge need it.
Where you set bleed in Trimto depends on the job:
- Labels, cards, flyers (Step & repeat): at the imposition step, under Cut settings. This article covers this case; the ready-made workspace is step and repeat imposition.
- Books and catalogs: in Book & Catalog Imposition, section Cut settings; see How to add a cover, page numbers and print a book.
- Die-cut nesting: no bleed field. Trimto draws the cut line from the artwork itself, and Cut line offset moves it in or out; see Die-cut nesting.
Steps
Open your design file (see Open a design file), select Step & repeat at the top of the left column, then click Continue.
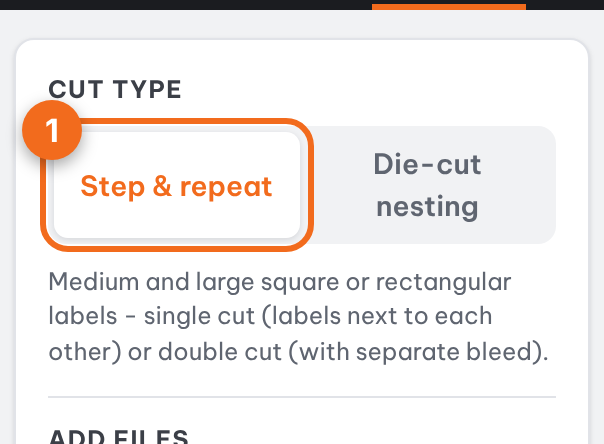
Select "Step & repeat" at the top of the left column In the right column of the imposition step, open Cut settings, pick Single cut or Double cut and enter Bleed per side. For full-bleed designs, Double cut with 3 mm is the usual choice: every label keeps its own bleed and the gap between labels is cut away. What positive, zero and negative values do with each cut style is explained in Step & repeat.
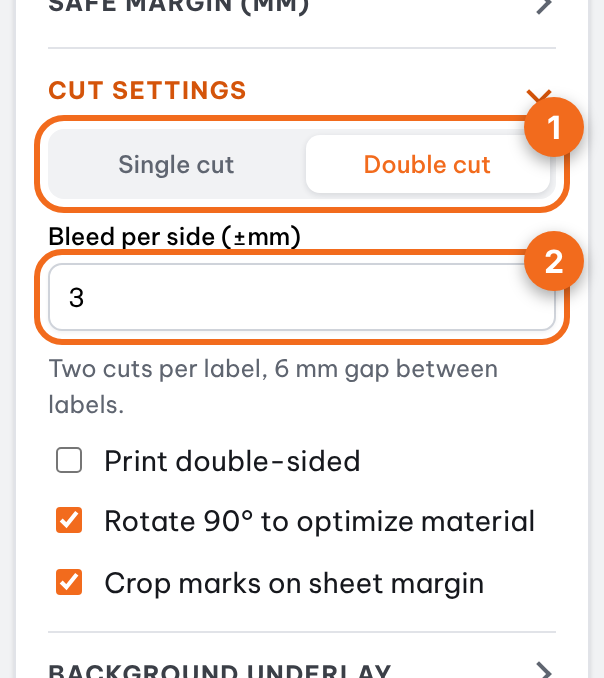
The "Cut settings" section: cut style and the "Bleed per side (±mm)" field If the file was exported with bleed (a PDF whose page is larger than its trim box, the usual result of "Use document bleed settings" in InDesign or Illustrator), Trimto uses that real artwork. If a file lacks bleed, the missing part stays white unless you open Background underlay, tick Add an underlay under the imposition area and pick:
- Color: one color under the label block, best for solid backgrounds.
- Mirror: reflects the label edge into the missing bleed, best for photos, patterns and gradients.
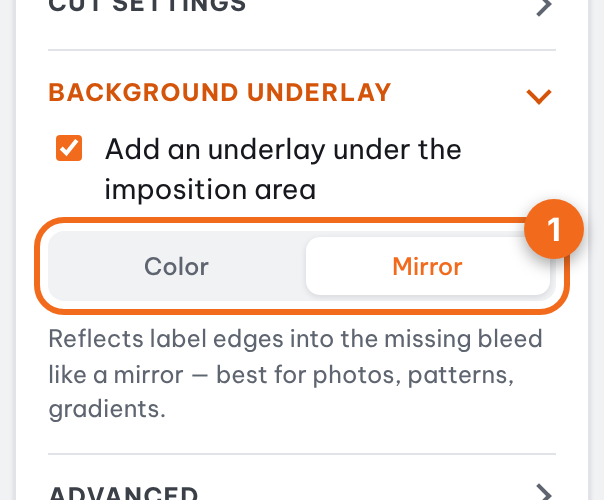
Background underlay: pick "Color" or "Mirror" Check the preview: dashed lines show where the knife goes. Click Export print PDF.
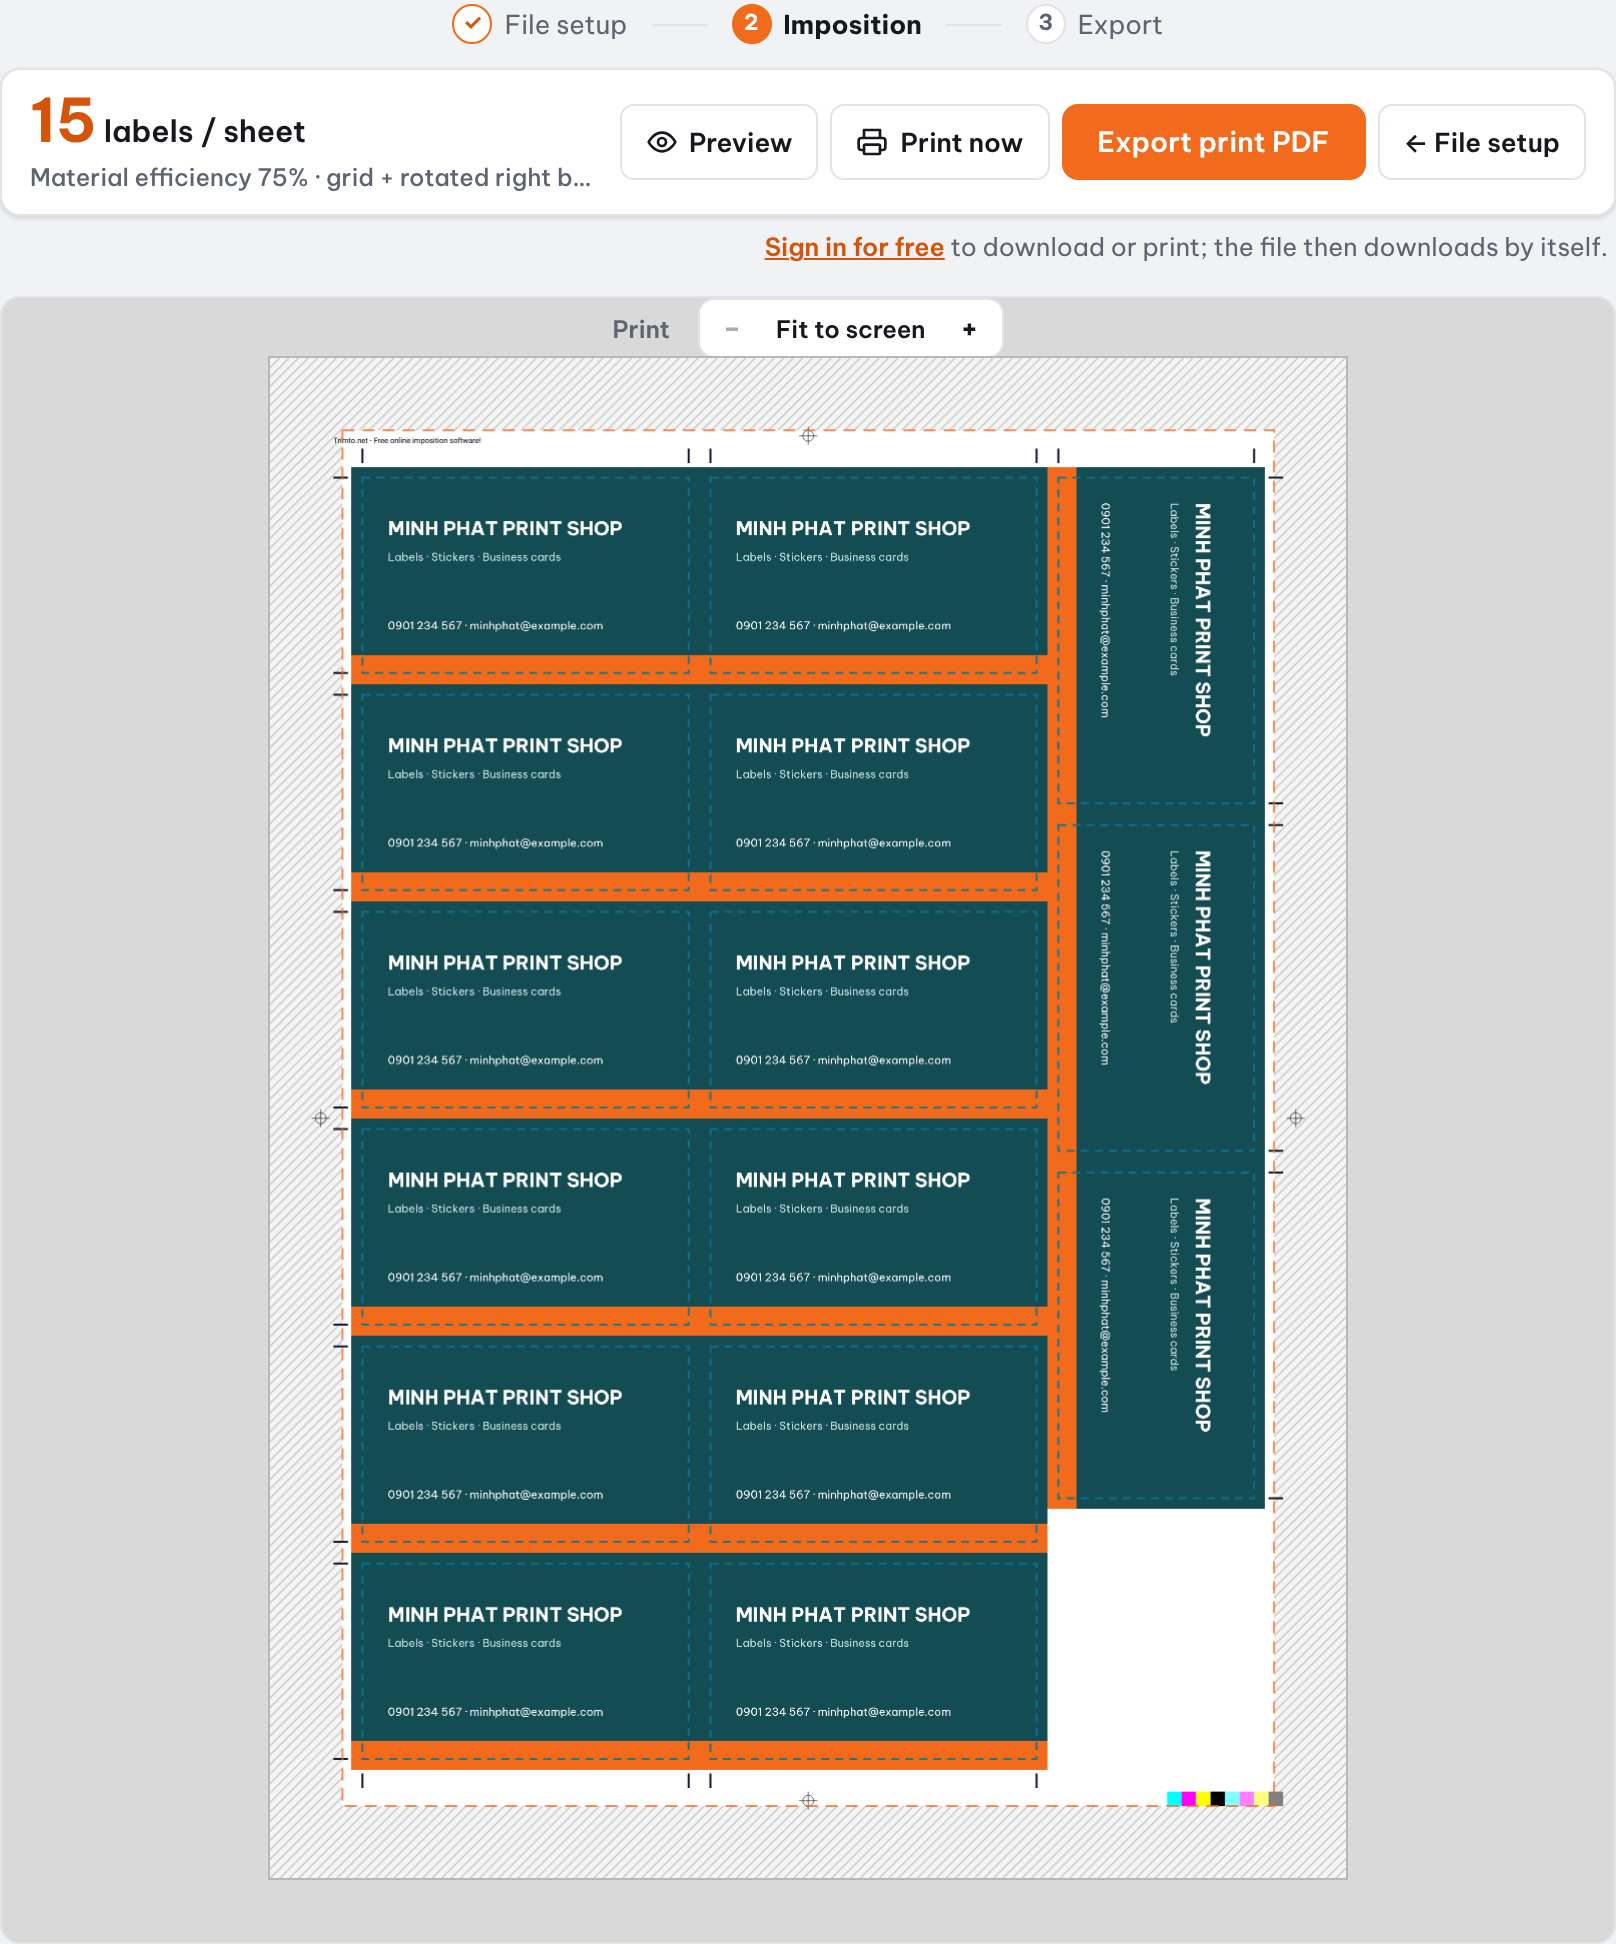
Preview: mirrored bleed around each label
Tip: keep text and key details at least 3 mm inside the trim line (safe area), since the blade can shift.
Common issues
- No bleed field: Die-cut nesting is selected. Switch to Step & repeat at the top of the left column.
- A design says "less than the … needed": the bleed in the file is smaller than the width you set. Turn on Background underlay (color or mirror); see also Step & repeat.
Further reading
- Adobe InDesign Help, Print bleed and slug areas: setting bleed in the design file and exporting it to PDF.
- Wikipedia, Bleed (printing).
- Trimto Learn: Bleed, trim and safe area explained.