
How to preview and export a print-ready PDF
User guide contents ↓Export buttons are located at the top of the center panel, in both the File setup and imposition steps.

Preview
Click Preview to open the PDF output in full screen, exactly as it will print. Always preview before exporting.
Export files
Downloading a PDF or images and printing require you to sign in (free, with Google or email). Saving a project file does not.
| Location | Button | Result |
|---|---|---|
| Imposition step | Export print PDF (die-cut nesting: Export print PDF + cut line) | Imposed sheet with nested labels, ready to print |
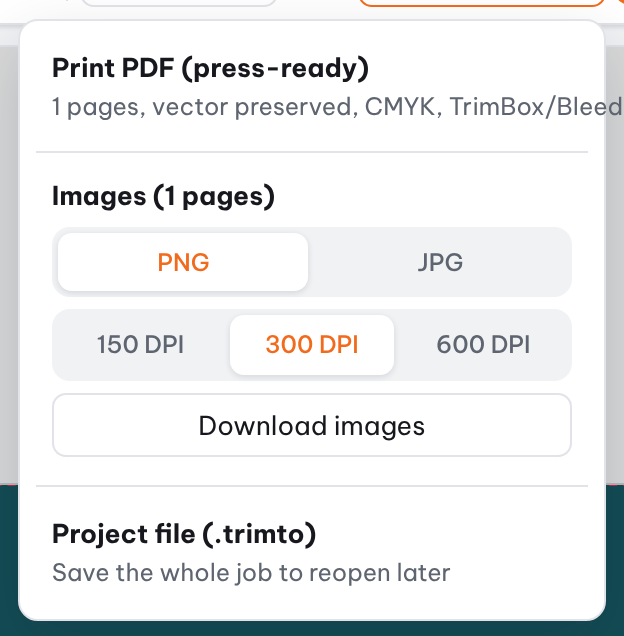
| File setup step | Download ▾ → Print PDF (press-ready) | Prepared file, one design per page |
| File setup step | Download ▾ → PDF of selected pages | Only the pages you ticked in the page list |
| File setup step | Download ▾ → Image | PNG or JPG, 150 / 300 / 600 DPI |
| File setup step | Download ▾ → Project file (.trimto) | Saves the whole job to reopen later |
PDFs keep vectors sharp, keep CMYK colors and spot colors as they were in your file, and record the page boxes printers rely on: the TrimBox (finished size) and BleedBox (finished size plus bleed).
Save and reopen a job (.trimto file)
In the File setup step, click Download ▾ → Project file (.trimto) to save the whole job as one file: pages, text, images, shapes, QR codes, numbering, data table, cut type and source files. No sign-in needed.
Next time, drop the .trimto file into Trimto (or pick it with Upload) to reopen it exactly as you left it. The file is read on your computer and never uploaded to a server. Source files are stored inside the project, so it can be fairly large.
Print now
Click Print now to open your system print dialog. Choose your printer, then set the scale to Actual size / 100%. Do not select "Fit to page", or labels will shrink and print at the wrong size.
Tip: In die-cut nesting mode, Print now prints only the artwork sheet, not the cut line page.
PDF or image?
| You need | Choose | Why |
|---|---|---|
| Send to a printer, offset or digital | Print PDF | Keeps vector, CMYK, spot colours, with TrimBox and BleedBox |
| Customer proof, web, chat | PNG/JPG image | Light, opens anywhere |
| Keep editing in another tool | Print PDF | Text and shapes stay vector |
150 DPI is enough to look at on screen; use 300 DPI or more for printing. 600 DPI images get heavy fast, so keep them for small labels with fine detail.
What to check in the preview
- The label count on the sheet matches what you need.
- Labels don't run into margins your printer can't print.
- Text, QR codes and numbering look right, and accented characters are intact (no empty boxes).
- Trim marks and print marks sit where they should and don't overlap labels.
- Die-cut nesting: a Same page cut line shows right on the print; a Separate page cut line shows as page 2 next to the print, so you can match it to each label.
Printing to scale: common mistakes
- Labels print smaller than real size: the print dialog is set to "Fit to page". Set Actual size / 100%. See also PDF prints at the wrong size.
- Edges clipped: office printers can't print edge to edge; leave a margin on the sheet or use a larger printer.
- Colours look off: a screen is RGB, a print is CMYK. For exact checks use a PDF viewer with overprint/separation preview.
- Project file very large: source files are stored inside the
.trimtofile; remove unused pages before saving.
FAQ
Why do I need to sign in to download? Preview and imposition are free to use; sign-in (free) is only required to download PDFs, export images and print. See Sign in and save settings.
Is my PDF uploaded to a server? No, files are processed on your own computer.
Further reading
- Adobe Acrobat Help, Print at actual size: the Actual size and Fit options in the print dialog.
- Wikipedia, PDF/X: the print-ready PDF standard and its TrimBox and BleedBox rules.
- Trimto Learn: Print-ready PDF checklist.